By Design
Designed to produce a bigger and bolder flavor of the great ’60s American amps with more tonal and modern gain options, the Tupelo pushes 20 watts through a pair of 6V6s, three 12AX7s, and a solid state rectifier. The combo is made of 1/2 blind dovetail-jointed Baltic birch and covered in the classic and classy 65Amps black and tan color scheme with gold piping and basket weave-like grille cloth. Like in the Lil’ Elvis, the speaker of choice is a Celestion G12H-30. Front panel controls from left to right are Volume, Smooth switch, Tone, Bump switch, Intensity, Speed, and Master. The rear panel offers a passive effects loop, two-button footswitch jack, dual speaker outs, an 8/16-ohm impedance switch, and IEC power cord input. The power section has been optimized for 6V6s and includes newly designed Mercury Magnetics iron to maximize the tone. The transformers are big and beefy — cool!
Peaking inside the beautifully designed and cleanly laid out chassis, you can see a mix of NOS carbon comp and metal film resistors as well as a selection of Sozo caps. According to 65Amps, they use the carbon comps in the tonal paths and the metal film resistors where stability is critical. The Sozo caps are also a mix of modern and vintage styles. With all of these additions I was ready to get right to it and check out what the Tupelo had to offer, so it was time to plug in.
Big American
I won’t lie — I’ve heard the clips of [65Amps co-founder and Sheryl Crow guitarist] Peter Stroud playing through the Tupelo and was blown away with that big, open jangle and gorgeous, chimey distortion, so I was expecting a lot. First up was my standard litmus test of a 2003 Gibson Murphy Les Paul R8. With the controls all set at about the halfway mark and the tremolo off, the amp kicked my ass right out of the gate. The Les Paul didn’t have the same chime as Peter’s Elliot guitar but I’d expect that from the different guitars. The tone was thick and chewy with a bold and wide bottom end and a killer crunch that had just enough top without being brittle. You could feel the headroom and power on big chords, making me realize just how loud 20 watts is — I was shaking the walls.
Backing off the volume knob on the guitar cleaned the amp up very nicely and brought out the more subtle tones that you only get from that type of combination. Throwing caution to the wind, I dimed the controls and hit the Bump switch. This setting gave me that open throttle feel, similar to my favorite Marshalls where it’s on the verge of feedback and notes effortlessly glide out of the guitar. Because the Master is a voltage control, it works differently than a typical master volume by bringing the voltage down correctly and effectively reducing the volume. At all but the lowest settings it didn’t harshly affect the tone. You can bring it down to a comfortable bedroom volume without killing the integrity of the sound, which is a nice bonus and also useful for late night studio sessions at the house.
The Smooth switch is labeled with a “+” and “-” on either side of the switch. In the “+” position, it acts like a boost of some sort and added a nice edge to the sound while increasing the gain. Both positions sound great, and if you’d like a little smoother sound, you can switch to the “-” position and take some of that edge off. I found this very useful for matching guitars to the Tupelo. In particular, my Strat liked the sound of the “-” position when using the bridge pickup.
Let’s not forget the tremolo! The tremolo is engaged either with the included footswitch or using the Intensity knob. The trem has a unique sound and a depth that I’ve rarely encountered on an amp. With the Intensity set at full and the Speed at the lowest position, it produced a thick throbbing that was syrupy and gooey. Bringing the speed up and backing down the Intensity took the focus off the effect, resulting in a beautiful swirl and depth that added richness and texture to the tone. The effect was so addictive I found myself leaving it on almost all the time, including soloing. It’s that good.
65Amps uses a combination of vintage American Allen Bradley carbon composite resistors and modern 1% Mil-spec metal film resistors in their circuitry. The carbon comp resistors are used in the tone path, while the more stable 1% Mil-spec metal film are used in areas that do not affect the tone as heavily. This creates a unusually repeatable and predictable formula that 65Amps says provides the best of vintage tone and modern stability and safety. 65amps purchased over 350,000 vintage Allen Bradley 5% Mil-spec resistors from the military and can build in this fashion for years.
The Les Paul wasn’t the only guitar that loved the Tupelo. Over the review period I ran a Hamer Korina Special through it with devastating results. The tone was so raw and edgy that it ended up being the star of a track on my upcoming CD. An Epiphone Sheraton matched nicely with the amp and gave off shades of tones that I hadn’t heard come out of that particular guitar before. As much as I loved the dirty tone, it was the semi-clean, backed-off volume knob sound that blew me away and had me playing for hours. A Richmond Dorchester with Lace Alumitone pickups and a Bigsby produced a glassiness and class, and the combination of the tremolo and a little dip of the Bigsby was right out of a David Lynch film. This could very well be my favorite sounding guitar with the Tupelo for cleans and slide.
The amp’s passive effects loop worked flawlessly with a variety of pedals and effects I ran through it. While I don’t usually use effects loops these days, it did bring up the point that if one is designed well there’s no reason not to use one for time-based or other effects.
The Final Mojo
While a lot of amps these days can do a lot of different tones through channel-switching and FX, the beauty of the Tupelo lies in its seemingly simple design. Even though there are only a few knobs and switches, each one of them serves up a potent range and, most importantly, allows the guitar’s personality to shine through. Throughout the review process, I found sounds in guitars I’ve owned for years that never had been heard before — a truly remarkable feat. With enough power to play at a club or in the studio, coupled with a master voltage circuit to cut down the volume when necessary, I’d say 65Amps really nailed it — again! This one’s a keeper.
Buy if…
portable, versatile, big American tone is what you’re looking for
Skip if…
you need more power (what? You’re playing the Enormodome tonight?)
Rating…
![]()
![]()
![]()
![]()
![]()
MSRP $2395 – 65Amps – 65amps.com
Source: https://mercurymagnetics.com/pages/news/PremierGuitar/PremierG-26.htm
Fender amps with transformer and capacitor upgrades –
Mercury Magnetics transformers in Fender SuperSonic. Note: extra wire is service loop for power suppy board.
The Fender SuperSonic illustrates the high component density of all the circuit boards.
Mercury power transformer with tube rectifier mod in Fender Custom Vibrolux Reverb. No service loop needed.
The cap installed on end due to a lack of room. NOTE: heat shrink tubing & RTV silicone.
Cap upgrade in Fender Super Reverb (Orange Drop -716P Polypropylene Film caps with copper leads).
An additional view of the Fender SuperSonic shows the Mallory type 150M Series – metalized polyester film caps.
A couple of months ago, I checked in a pile of amps for repair/freshening up for a band that was going into the studio to record another album. While reviewing this pile, I found that I was in possession of the main recording amp for the front man. It was a little vintage Supro that had certainly been around and through the ringer. While it definitely had a fantastic tone, it had noise and reliability issues due to its age. I decided to surprise the fellow and make a replica as close to the original as possible. In my own amp designs, I try to add a dash of originality into the mix, but for this project only a carbon copy would do. I pondered the project endlessly, obsessing on the creation morning, noon and night. A couple of days after deciding on a game plan, I received a call from the band’s liaison asking me if I would mind making a clone of that amp only with less noise and increased reliability. I was now on the hook. Time to put my plan into action.
The first step was to try and find a schematic for the little Supro Super. A few were found in my files and on the internet, but they didn’t seem to be of this exact incarnation. Since my plan was to be blueprinting and cloning this amp anyway, I decided to dig in and make a schematic. I traced the circuit, noting the apparent values (what was written on them) of resistors and caps etc, as well as the type (composition) along the way. All of the resistors were carbon comp, and the coupling caps were mostly ceramic discs. I then traced the circuit again, this time measuring and taking notes on the actual values and voltages of the resistors, caps, transformers, plate voltages, cathode voltages, etc. The differences were substantial. The tolerances on these amps were fairly broad to begin with; on top of that, the values of the components would certainly drift over the 40 odd years since this amp was built regardless. Now that I had the blueprint made, I needed to acquire the parts.
I placed a call to Paul Patronete of Mercury Magnetics to get transformers with the exact specs required. We do quite a bit of business together and he has always been a great help with projects like this (as well as with my DB7 trannys). Surprisingly, they had them on the shelf and ready to ship.
With those on the way, it was time to start punching the chassis. I selected an aluminum box to be used as a blank and laid out the measurements. My goal was to create a replica in tone and feel only, so I took the liberty of moving some of the component placement to cut down on the noise. For example, I spaced the transformers out a bit and took into consideration the proximity of the output tranny and the first gain stage. During the construction, I also implemented star grounding and ran shielded wire. For the resistors I used NOS carbon comp where it made sense tonally (input, plate load etc.) and a mix of carbon film and metal film in other places. At times, I had to create values using two resistors to try to match the values of the ones that had drifted.
Ok, ok, I know that I said that I was making a carbon copy clone here but I just couldn’t bring myself to use ceramic discs for the coupling caps. Instead, I used caps that we have made to our specs for our amps by a high-end manufacturer here in the U.S. They don’t have the same two-dimensional graininess as the ceramics. Instead they have a very open and airy quality to them but shift to the point of flattening out a bit when using some right hand dynamics.
With the guts assembled and all of the voltages checking out, it was now time for the speaker selection and cabinet construction. I chose to make a separate baby head and speaker cab for this project. I used pine for its tonal qualities and tried to match the size of the original combo. For the speaker itself I used an 8″ Weber VST Alnico that was a direct replacement of the original. The cabinets were then covered in a very funky black cowboy print type Tolex. Tube selection was also very important. I tried many tubes from my private stash and finally rested on an NOS RCA 6V6 for the output and NOS RCA grey plates for the preamp.
The end result was satisfactory but there was something missing. The tonal characteristics were all there but it just didn’t seem to have the “magic.” I gave it to the client and told him to play/abuse it a bit to see how the character would change when the amp/speaker had some time to break in and then I would finish the voicing. A couple of weeks later I picked it up from their studio along with a wish list of how the tone was to be sculpted. I placed the amp on my bench ready to start the voicing, plugged the head into a very weak and old 10″ Alnico Jensen that I use as one of my test speakers and strummed a chord. WOW! It sounded amazing! Hmmm, what happened I wondered?
I then plugged the amp into the cab that I had made for it. While it still had the tone, the dynamics just weren’t there. The speaker that was in my test cab seemed to be the missing ingredient! Fortunately, it was one of four that I had pulled out of an old Hammond organ cab of mine. The new speaker cab was taken apart, a 10″ hole cut in the baffle board and one of the speakers installed with hardly any room to spare. I tried again… WOW! With this combination you could play perfectly clean, sparkling chords and using right hand dynamics shift into blistering, compressed distortion. Truly outstanding! The Weber is a fantastic speaker — don’t get me wrong — it’s just that for this application I needed a really tired, old, crummy speaker to do its thing. The end result far exceeded the greatest expectations of both my client and I. Certainly well worth the time spent on a small pet project in a busy shop. But hey, who needs sleep anyway?
Source: https://mercurymagnetics.com/pages/news/PremierGuitar/PremierG-16.htm
Anyone familiar with Mojave Ampworks founder Victor Mason’s other venture — a California dealership of vintage British amplifiers known as the Plexi Palace — will be aware of this amp maker’s fanaticism for classic Marshall-style tones. The Scorpion outwardly appears to take a serious stab at satiating that craving in a modern package, but don’t be too quick to label this 50-watter as simply a Marshall plexi update. While the Scorpion certainly aims squarely at the big Brit-rock tones of the late 1960s and early ’70s, it’s nowhere near to being a clone, and the design has enough clever twists to make it an entirely original creation. Although nominally a 50-watter, the Scorpion aims to provide big-box 100-watt sound and feel in a small package.
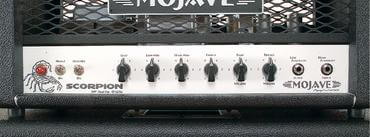 The core of the Scorpion’s sonic DNA revolves around that big, crunchy, dynamic EL34 sound with the characteristically thumping lows and singing highs. But this model redraws the roadmap that takes you there, and adds plenty of new ingredients in the name of versatility. Mojave keeps the adjustable fixed-bias output stage with a dash of negative feedback, cathode-follower tone stack, and solid-state rectification that partly define the post-1967 Marshall 50-watters, but re-labels the tone stack as Bass, Low Mid, High Mid, and Treble, with High Mid taking the job of a Presence control. It also employs a nifty trick in the preamp stage that has become something of a Mojave standard: internally ganging together two different first gain stages comprised of an independent, parallel-wired twin-triode 12AX7 for each—one voiced to emphasize bass, the other to emphasize treble—and providing a Volume control for each so you can blend them together. This is not a master volume amp, but it carries a Power Dampening control on the back panel that governs a unique proprietary circuit that reins in volume levels at the output stage, allowing you to take the Scorpion from 50 watts down to 3 watts, and anywhere in between. Other features include High and Low Sensitivity inputs, and a back panel 1/4″ Line Out jack with a Level control and ground lift alongside dual 8- and single 16-ž outputs.
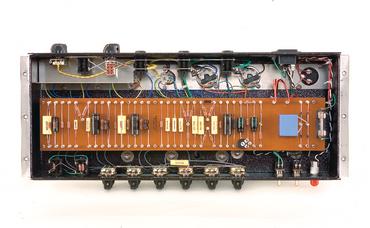 As alluring as it might be from the outside, much of the Scorpion’s appeal reveals itself when you pull the chassis from the cab. This amp is hand built to some of the most exacting standards found in the market today.
Powder-coated black metal grilles protect components front and back, and the brand is boldly represented by an acid-etched aluminum nameplate. The rugged turret board follows a linear layout from input to output stage, and the flying-lead connections to transformers, potentiometers, switches, and tube sockets (all chassis mounted) are made with Teflon-insulated, silver-plated copper wire. While many amp makers swear by old-style carbon comp resistors for “warmth” and “vintage authenticity,” Mojave uses high-grade metal film resistors because they can be obtained in more precise values, and generally result in a lower noise floor. These share the board with Sprague filter capacitors and custom-made, one-percent tolerance film and foil polypropylene signal capacitors. Transformers are all custom made for Mojave by the highly regarded Mercury Magnetics company, and the whole shebang is bolted together in a reinforced aluminum chassis. Finally, the output transformer presents a novel twist on the classic 50-watter formula, as Mojave has spec’d it for “triple-capacity,” which can handle as much as three times the Scorpion’s 50-watt output. This approach can achieve the response of a 100-watt stack in a smaller amp, resulting in firmer lows and remarkable headroom.
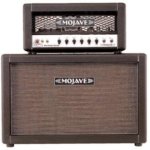
Our review sample came with the 2×12 semi-open-back cab loaded with Celestion G12H-30s, but a closed-back 4×12 is also available for $985 retail. The cabinet is a robust, yet portable unit with a single, recessed handle positioned top center.
I tested the Scorpion with a range of guitars, including a Fender Stratocaster and a Telecaster, a Gibson SG Special, and a PRS Singlecut Trem. The overriding impression this amp left with me was one of power, body, and massive volume — even with single-coil pickups. This is one massive sounding amplifier, and Mojave has certainly achieved the goal of attaining 100-watt-style performance in a 50-watt package. It delivers a wide, blooming soundstage with tight, but not overly booming lows, a thumping midrange, and glittery, yet nicely recessed highs. In short, you get broad, punchy, in-your-face dynamics across a frequency spectrum that’s very flattering to rock guitar.
With the Strat and Tele, the Scorpion exhibited stunning clarity and superior headroom up to about a ten o’clock position of the Volume controls, at which point it was already too loud for home studios, basement rehearsals, and many club gigs. Humbuckers and P90s brought out the raunch a little sooner. Roll it up from there, and you segue through toothsome crunch to absolutely screaming lead tones — both of which are easily cleaned up at the guitar’s Volume control. This is the fat, tactile, airy, classic sound that arena-rock dreams are made of, and when you get the volume up anywhere from one to five o’clock, it’s a rare and spine-chilling experience to just stand in front of this rig and wail. Tweak the EQ to taste, put a booster or distortion pedal in front of it as desired (all of which this amp handles very well), and there’s very little in the broad fields of rock, blues-rock and metal that it can’t do.
That said, the trend these days is toward downsizing, and plenty of players are looking for amps that sound like cranked 50-watters in 15-watt packages, not 50-watters that sound like a 100-watters. The Scorpion’s Power Dampening control is a cool feature that brings levels down as much as you’d like, but it does color the tone a little bit, and you also need to dial down the Volume controls to retain similar headroom at lower volumes. In short, this powerful monster is most cut out for serious rockers who expect to put in most of their playing hours on large stages.
The Scorpion also sounded fantastic through the 2×12 cabinet, which seemed to take everything I could throw at it without breaking a sweat. But if you plan to play this amp toward max in big venues, you might consider pairing it with Mojave’s 4×12 cab. I ran the Scorpion through a custom 4×12 with G12H-30s in my rehearsal space, and it proved an equally thrilling endeavor, with that huge kick in the gut that lets you know you’re pushing a lot of air. However, it wasn’t demonstrably louder than Mojave‘s very efficient, compact open-back 2×12, so the choice is yours. But whatever you blast it through, this is an extremely accomplished-sounding, as well as a stunning piece of craftsmanship.
![]()
Source: https://mercurymagnetics.com/pages/news/GuitarPlayer/GPAug07.htm

You’re are of the phenomenon… Suddenly a guitar, amp or some other new or pre-historic gizmo seems to come out of nowhere to achieve white hot, must-have status. The same thing can happen with previously unknown builders, too. Take Marshall 18W “clones,” for example… For the past 3-4 years these recreations of the rare originals were hot, hot, hot, with small custom builders sprouting and thriving from within the 18W Discussion Page. This was good for builders, good for players, and an unanticipated consequence was spawned — the rapid expansion of the cottage industry providing small amp builders with custom-made chassis, capacitors, transformers, cabinets, and just in time, an expanded range of guitar speakers developed by Eminence and Celestion. By the time Marshall jumped into the game with their own hand-wired 18 and 20W amps, the custom-built 18W wave had begun to crest and break, but there is now a new ripple on the horizon that we predict will soon form a formidable new wave among custom builders — the Vox AC30. Granted, Korg has already issued their own limited edition version of a hand-wired AC30 following the success of the British-made Vox AC30 TBX reissue, and we have reviewed the AC30 Custom Classic in this issue with backup color provided by The Radiators’ Dave Malone. While the Custom Classic is a very affordable and perfectly respectable alternative, it would be unreasonable to expect an economically built, mass produced amp to seriously rival a vintage JMI AC30 in original condition that has been competently serviced by an experienced tech. What about the original Matchless DC30 built by Mark Sampson? Great amp, but not the same. Players craving the authentic sound of an original AC30 have four choices today—find an restore an old JMI, buy a reissue and play it as is, have the transformers, caps and resistors in the signal path of your reissue amp upgraded, or buy booteek.
Well, it’s one thing to lovingly resurrect the rather Spartan Marshall 18W circuit, and quite another to tackle the original JMI design, which is much more complex, costly and labor-intensive. Furthermore, some builders may succumb to the temptation to significantly “improve” the original AC30 circuit. That would be a mistake. The successful builder will locate a vintage AC30 with truly bitchin’ tone (assuming they are capable of identifying said bitchin’ tone) and build more, per the specs revealed by blueprinting the old one. As far as we know, this has yet to happen on a meaningful scale. To date, we have located one potential candidate built by DST Engineering that will be reviewed next month. If anyone reading this believes there are more, please let us know.
 Meanwhile, let’s address the common belief that 45 year old Vox amps are too unreliable — dangerous, even — for ecstatic thrashing, let alone regular gigging. While it is true that the design of the AC30 (and AC50) provide precious little ventilation (the top vents are stingy at best), we have seen AC30s used by touring musicians and there were no flames shooting from the back (Daniel Lanois didn’t even bother with a backup). So we asked ace amp tech Don Butler (Toneman) to precisely describe the steps he takes to make a vintage Vox roadworthy…
Don Butler: Vintage AC-30s suffer a lot from neglect. People are under the misunderstanding that all you need to do to any vintage amp is replace valves/tubes occasionally, but it requires much more than that. Here’s what I do when I get an AC30 or AC50 in for service that hasn’t had anything done to it since the day it left JMI in Darford, Kent…
Replace the dual 16uf @ 500v can, replace the 32uf @450v cap in the supply line that goes from the bottom power amp section to the preamp, and replace the dual 8uf can in the pre-amp. Replace the 32uf @ 450v cap for the Top Boost circuit (if the amp has integral Top Boost). Replace all the 25uf @ 25v cathode bypass caps (I see a lot of Vox amps where all of the main filters have been replaced but not the cathode bypass caps. It’s really just as important to replace these as well, as they set the gain for each area of the circuit they’re in). While I’m at it… Electrolytic caps have a lifespan of 7 to 10 years. After 10 years they start to deteriorate and slowly affect the way your amp functions (and not for the better, either). If you have an amp that 35-45 years old with original filters in them, well then, you’re asking for a lot of problems by not changing them. I’ve had a few vintage amps where the filters were not changed and they eventually shorted, taking the output tranny or choke of the mains tranny with them. To me they’re cheap insurance to keep your amp working properly and sounding good. By the way, the worse thing anyone can do to any amp is not turn it on for at least an hour a month. That keeps the electrolyte in it’s liquid form and prevents it from drying out and crystallizing.
Back to JMI-land — replace the output section cathode bypass cap (250uf @25v) and the four 100 ohm resistors on each EL-84 socket. These almost always drift way out of tolerance. Use 1 2att 100 ohm carbon film. On any voltage path resistor that needs to be replaced, use a carbon film. But, in the signal path, never use anything but carbon comp, otherwise it won’t sound the same. Vox always used carbon comps for everything. These days you can get 5% tolerance carbon comp resistors — in the sixties you were lucky to et 10%, and most used + or – 20% resistors.
Check each resistor with a meter. If the resistor is more than 20% off, replace it. Check the output tranny. Measure the primary side from center tap to each anode. The center tap is always soldered onto the main supply filter can. Be sure to discharge the cans before you do this!! The anodes are hooked up to pin #7, and they should read very close to each other from the center tap to each anode. Each era had different readings. A Haddon output transformer has a different primary reading than a Woden and different from an Albion as well.
Clean each valve socket, input jack and pot with Caig DeOxit D-5 contact restorer. And here’s a bit that is as important as everything else — make sure every nut, bolt, screw and pot nut is tight. You would not believe how much you can improve the noise and hum in an AC30 simply by doing this. I’ve had amps where every one of them is loose! On the 12AX& that is used for the Normal and Brilliant channels., JMI used a wire from pins 4 & 5 to ground to keep the filament supply grounded. Cut this wire off from the pins to ground. Take two 100 ohm resistors and attach them from each side of the filament supply at the pilot lamp to ground. This is what Fender did for years to make the filament supply quiet. It’s an easy “center tap” for the 6V AC filament supply.
 Check all your valves/tubes. Always use a matched set of EL-8rs and good 12ZX7s and a decent 12AU7. Spend the money for a good rectifier! You have to look at the cost of valves as an investment in your tone. Good preamp valves should last at least 10 years for NOS. I’ve seen many Ac30s with perfectly working Mullard GZ-34s that were 40+ years old. EL-84s get beat-up pretty good, but still important to buy quality valves. This is also important: With any and every JMI Vox Amp, use a Variac! Why? My wall voltage reads anywhere from 114v to 122v A.C. Vox amps want to see 105v to 110v MAX! The voltage selector may say 115v, but Sergio at Mercury Magnetics has told me many times that the real input voltage of old JMI amps was 110v max. If you plug your AC50 into the wall at 1222v, instead of your B- supply reading 470v like it should, you’ll get over 500v D.C. Most of the components are rated at 400v-500v max. By putting more in you run the risk of shortening the life of most of the components if not frying them outright. If you follow this advice and servicing recommendations and use a Variac, you should have a happy AC30 that will work for you for years without trouble. It doesn’t hurt every few months to tighten up all the screws, nuts, etc. If you tour or gig with an old AC30, you have to know at least a little bit about how to maintain your amp. If you’re too lazy to do that, then buy a new Custom classic and send it to me to mod into one that sounds very close to a JMI-era amp. There’s a good book you can get from a guy named Stephen Grosvenor in the U.K. called “A Service Engineer’s Guide to the Vox AC30 Valve Amplifier.” This just came out in June (’06).
TQR: Not all power tubes can take the heat that Vox amps produce. What are your favorite choices for output tubes in old AC30s and AC50s and do you have any suggestions for keeping these amps running at lower temps?
Don Butler: AC30s — Tungsrams and Polem/Telem (same manufacturer — these are made in Poland) for NOS and EI Elites for new tubes. The Tungsrams are very clear, open sounding with nice chime on the top end and a good tight bottom. Same with the Polems, but the Polems have a bit more midrange. I find Mullards very dark and flat by comparison. I’ve tried just about all the NOS EL-84 types in my Voxes and Marshall 1974X. The EI Elites are a great sounding tube but lack just a bit of the detail and harmonics of the NOS. Still, a great sounding tube compared to the rubbish that’s being made these days.
TQR: You’re known for upgrading stock “reissue” amps. Describe the typical upgrades and modifications you make to reissue AC30s and the most recent AC30 Custom Classic.
Don Butler: I replace the output tranny with a Mercury Magnetics clone, same with the choke, as the choke is a very important piece of the puzzle. I replace every resistor and cap in the signal path with carbon comp resistors and Sozo caps. I have an audio “break-in” CD that I run into the amps after I’m done. About 4-5 times simulates the amp having been played for around 80-100 hours. I do this because every output tranny takes around 20 hours to break in, and the Sozo caps take around 100 hours to break-in. This way when my customer gets their amp back it’s as if it’s already been played for a bit and should be more open and touch responsive than if it hadn’t been played. I do also play through them when I’m done. I have to make sure they sound right. I play them again after I run the CD through them, and it’s fun to hear the actual difference!
Source: https://mercurymagnetics.com/pages/news/ToneQuest/_2007/TQRJan07-1.htm

I have a 1987 model 50-watt reissue Plexi head that is completely stock. I don’t care for the sound of an attenuator, and I want this amp to sound as close to an older Plexi as it can get. What do you recommend for the best possible tone?
We get this kind of question nearly every day. I’m sure you’ve heard the phrase, “No two Plexis sound the same,” but there’s a ring of truth to that. One could surmise that if Marshall (as well as other amp manufactures of the time period) ran short of parts it would substitute the next-closest thing to keep the production line moving along, which would logically explain the numerous differences in circuitry that have been documented. Additionally, a lesser known fact is that there were also transformer differences in the early Plexis.
If, for you example, you were to substitute one power transformer for another, the B+ (high voltage) might be higher or lower, which would have a direct impact on the tone, performance and feel of the amp. This helps to explain why some Plexis are harsh, overly bright and don’t break up well, while others break up nicely, have a warmer tone and have a better overall feel.
How can you get your reissue Plexi to sound, feel and perform more like an older Plexi? First, let’s agree that tone is a matter of taste, and in matters of taste there can be no right or wrong. Simply put, it comes down to whatever works best for each individual player based on his or her preferences in regard to tone.
Transformer Upgrades: Simply changing the output transformer is enough to satisfy the needs of some players. For others it also requires upgrading the power transformer as well as the choke. I’m sure there are many of you who may wonder, “Why change the choke?” Rest assured that selecting the right choke can make as much of a difference in tone and feel as changing the output transformer, and the same can be said about upgrading the power transformer. Many companies offer Plexi-spec output transformers as well as a complete Plexi-spec replacement transformer kits. We exclusively use Mercury Magnetics and would encourage you to check them out. Look at the transformers from other companies too. If you aren’t certain what you use, please feel free to call us.
Components: This has been covered at great length on numerous forums and bulletin boards across the Internet. Can upgrading the components on the PCBs (Printed Circuit Boards) make an audible difference? Yes, absolutely. What are the best components to go with? Again, this is a subjective thing. Upgrading the coupling capacitors (caps) from the box style caps to higher-quality caps (e.g. SBE Orange Drops, Mallory, Hovland MusiCap, Solen, Auricaps, etc.) will no doubt provide an overall sonic improvement. For cathode bypass caps (caps in series with the cathode resistors in the preamp section), the majority of players seem to gravitate toward non-polarized cap cathode bypass capacitors versus the polarized bypass caps. For resistors I personally prefer metal film, since they don’t drift off value over time and will produce less noise/hiss over time. Opinions vary from one person to the next, though, so use whatever you’re most comfortable with.
Master Volumes: You can go with a pre- or a post- PI (Phase Inverter) master volume. Both have their advantages, but both have disadvantages as well. The easiest to hookup would be a pre-master volume (see JCM800 2204/2203 schematic), which is beneficial in that the EQ section (Bass, Mid, Treble) is much more active and responsive. There are various kinds of post-PI master volumes. Some are extremely transparent, while others color the tone of the amp in an undesirable way. The advantage to a post-PI master is that you can get the vintage distortion or breakup much like you do when you turn a Plexi to somewhere in the range of 5-7 (on a scale of 1-10). Our V-Plex Series amplifiers employ the post-PI master volume. Some of the Plexi reissues have not come with screen-grid or input-grid resistors. Without these resistors Plexis tend to sound squishy, muddy and smeary. For EL34’s I recommend 5-watt 1K screen-grid resistors, and for the input resistors (pin #5) I recommend .5- watt 1.5K metal film.
Feedback resistors: We have seen many different values in the older ’60s Plexis. We’ve also seen the resistor assigned to the 4-, 8- or 16-ohm tap as well as the positive side of the speaker jack. Do they all sound different? Yes, they do. Remember, there is no substitution for hands-on experience when it comes to determining what sounds and feels the best. I hope this helps you find the tone you want. Have fun tweaking your amp.
In part I of our Marshall JTM-45 transformation process, we installed a point-to-point board from Metropoulos Amplification (www.metroamp.com) and began to hear the positive results of our test Marshall as it came to new life.
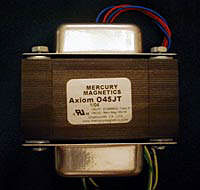
Now, in Part II of our continued Marshall JTM-45 transformation, we move forward with two additional changes in addition to having the opportunity to compare the final results to an original 1964 badge-logo Marshall JTM-45. The two changes that we decided to perform were to swap out the stock output transformer to a Mercury Magnetics™ (www.MercuryMagnetics.com) Axiom® O45JT-C model as well as to upgrade the board’s capacitors to those made by SoZo Amplification. To say that we were excited as well as just plain curious about the final results, especially when we could now compare it to an original JTM-45 — is an understatement.
We contacted Paul Patronete at Mercury Magnetics™ and he hooked us up with the Axiom® output transformer. Paul added that the Axiom® O45JT-C is a custom version output using Teflon wire instead of the normal UL1015 vinyl wire. The Axiom® O45JT-C output offers 8 & 16 ohm secondary taps. When it comes to output transformers for the JTM45 amp, Mercury Magnetics™ offers a plethora of options beyond the stock, cloned, vintage replacement. Options available in the Axiom® line of output transformers are primaries optimized for KT66/6L6/5881 tubes or EL34/KT77 tubes. Secondaries with just about any output impedance combination that one could want. Many of these custom Axiom® models feature “mil-spec” Teflon wire leads with silver tinned, nineteen strands of high purity copper. All of the Axiom® transformers are hand wound from period correct specimen, vintage blueprints. One of the more popular Axiom® pieces that Mercury Magnetics™ offers is an exact clone of the highly coveted Radio Spares output transformer. The Radio Spares output is from the early original, first run Marshall JTM-45 production amplifiers. Mercury Magnetics™ offers several versions of the Radio Spares output. One of the most popular versions is a Teflon wire leaded version. The Radio Spares transformer is well-known for its association with the earliest Marshalls and according to Paul is what you’d find in the famous Eric Clapton “Bluesbreaker”-era amp.
Those that have listened to or played through a properly running Marshall JTM-45 know the sound. It’s a smooth and naturally compressed distorted tone that when pushed will provide just enough crunch to know it’s characteristically a Marshall, but without any of the “buzzing bees” preamp tones characteristic in high-gain preamp-gain emphasized amplifiers. As you push the volume controls up higher on a the best JTM-45s, it’s clearly the sound of rock with its fat bottom end, lovely harmonic overtones, and sustain that sits well with the best blues and classic rock tones heard. All of this packaged in an amp that really is one of the most dynamic and player-responsive amps ever built.
The reissue JTM-45, while certainly not a “bad” amplifier on its own, really does lack much of the detail and smoothness that is really much easier to grasp and identify when heard. For example, the reissue JTM-45 in stock form would thicken up appropriately with the expected tube compression when turned up, but it clearly was not as smooth. There are definitely some tones that sound a bit “grainy” and edgy that a properly running original JTM-45 doesn’t have.
A project such as this JTM-45 reissue transformation offers an exciting opportunity for those serious about maximizing their tone, but either don’t have or don’t want to shell out the prices for the originals. As of this writing in early 2004, script-logo JTM-45s are commanding a minimum of $4,000 and the better examples are going for more than that. Our badge logo JTM-45 featured here generously on loan for the story has a value that may well be approaching $10,000 by today’s estimates.
 With that aside, we should start out by saying that this is not a thorough “apples-to-apples” comparison between the two amps. To be 100% fair, ALL the components would have to be altered to the exact specifications of our 1964 badge-logo Marshall JTM-45 and that really wasn’t the point. The point of these transformations was to get the stock reissue JTM-45 sounding more like the “real thing” as described above with regards to the powerful, smooth and dynamic Marshall tone.
Another issue beyond the component values is that we’ve opted to keep the power transformer in stock form for the time being in the JTM-45. As a result the transformers will supply a different amount of B+ current to the plates and so it will not respond in exactly the same way as the original Badge logo model.
 One final, and perhaps most important point, which Mercury Magnetics™ vice-president Sergio Hamernik added: “The transformer in a 30-year old amplifier will sound characteristically different as it ages compared to a new replacement, even if the replacement is built with the same materials.” And while the component materials and manufacturing methods used by Mercury Magnetics™ are made to the exact same standards as the originals (Sergio also added “Every turn, every layer, is copied and blueprinted exactly, including any original manufacturing anomalies found during our rewinding process of the original, vintage specimen, Sergio emphasized that the ToneClone™ series transformer will still sound different, but “like the original did in the amp when it was new” and not like the tone of the aged 30-year-old transformer. Since much of our favorite tones were recorded at least 20 years ago, perhaps this isn’t such a bad thing?
Sergio did suggest breaking in the new Axiom® transformer with 20 to 40 hours of hard playing time. He also said that this break-in period will get the transformer about halfway there to that 30 year seasoned tonality. Thermal cycling and running magnetizing currents through the transformer (playing the amp) will definitely sweeten things up in that period of time.
We could and may still make further changes to the reissue JTM-45 in the future and report back. However, with the point-to-point board, reduced “vintage” filtering, and tube swap that we performed last time around, along with the planned replacement of the on-board capacitors and output transformer for this second round, we thought that we’d be in really good shape with the final tonal results of this amp. And for those that missed it previously, we had previously written about Mercury Magnetics™ output transformers used in a 50 watt Marshall and were very pleased with the results. We anticipated nothing but the same results with the change in the reissue JTM-45 this time as well.
So far our project amp has KT-66 power tubes, 32x32uf and 16x16uf filter caps and a Metro Amps point-to-point circuit board. At this stage, we were very satisfied with the results. We could have stopped here and had a real tone machine, but we wanted to see if we could get even closer with a few more changes. Sonically, the reissue at this point prior to the SoZo caps and output transformer change, did exhibit more of the growl and gain of the original, but it still wasn’t nearly as smooth or as dynamically punchy as the badge logo JTM-45 was.
Mike Mullen on testing the SoZo Caps
 While waiting for our Mercury Magnetics™ output transformer, I read about some capacitors that created quite a buzz on the Plexi Palace vintage amp forum. We found that SoZo Amplification was offering custom made capacitors aptly named “mustard caps”. They are obviously mustard yellow but apparently these caps are also made to the same specifications as the yellow mustard capacitors which were originally found in tube amps from the 1960s and 1970s. These little yellow jewels keep the foil thickness, polyester film dielectric and voltage ratings the same as the originals. In addition to the material makeup of the capacitors they also share the same physical dimensions. According to the SoZo Amplification website, the physical shape has a lot to do with the sound because it changes the slew rate.
The SoZo Mustard Cap is longer and thinner as compared to most high production caps readily available today. The additional length results in a different signal delivery time, changing the harmonics of the capacitor and yields smooth, clear, thick lower-mids. Polyester film was chosen because of its deeper tonal character and aluminum foil was chosen to exactly recreate the capacitor’s original sound and performance. SoZo also chooses to use tin-coated pure copper leads, which SoZo claims aids in the retro mustard cap sound.
I promptly received the package containing five .022uF and three .1uF SoZo Mustard Caps and soldered them in. In about thirty minutes all the caps were installed and I was ready to hear the results.
I flipped on the power, plugged in a Seth Lover-loaded Gibson Les Paul and let the KT-66’s warm for a few minutes. Turning off standby, I decided to start with my best impression of Angus Young from AC/DC to entertain my neighbors. What I heard from my Celestion loaded 2×12 cabinet was clear, warm guitar tones that sounded ALIVE! The tone of the amp was basically the same, but it was much clearer, richer and more complex than what I heard before. I was very pleased with the improvement.
Anyone that is due for a cap job on his or her favorite amp should really give the SoZo “mustards” a try and change those along with the electrolytics while you’re already there. I think the results are very satisfying and the cost runs about the same as a decent guitar cable. The caps can be ordered direct from SoZoAmplification.com or from MetroAmp.com. MetroAmp.com is offering these SoZo caps individually or they can be ordered with one of their point-to-point boards.
A final point is that SoZo amplification states that there is a break-in period for the capacitors and that the tone will actually improve and be at best form sonically sometime between 40 and 70 hours of use. While I’m not there yet as far as hours of use, I definitely like what I’m hearing so far!
Installation and listening to the Mercury Magnetics™ O45JT-C Output Transformer
 The Axiom® 045JT-C output transformer is part of the Mercury Magnetics™ Axiom® ToneClone™ series, and is 100% hand wound in the USA by Mercury Magnetics™ at their factory in Southern California. Mercury Magnetics™ offers a number of transformer clones for JTM-45 amplifiers as Marshall used a few different suppliers during different times with its own JTM-45s originally. Some people may have a preference for the earliest transformer equipped in JTM-45s, which were those built by the Radio Spares company. According to Mercury Magnetics™, the Radio Spares output transformer has more “high-fidelity” characteristics in its tone. According to Paul at Mercury Magnetics™, their Radio Spares clone is a special, intricate transformer that produces a subsequently wider frequency response and in some ways mirrors other transformers in design such as the early famous Partridge units in the Hiwatts.
However with that said, there aren’t comparatively as many JTM-45s equipped with original Radio Spares output transformers so we went with the more commonly found transformers as found in later JTM-45s. When speaking with Paul, he also noted that the original, vintage “Radio Spares” equipped JTM45 amplifiers are highly sought after and can command big dollars in the musical marketplace. Perhaps we’ll experiment with one in the future to hear the differences for ourselves.
The installation of any output transformer, while seemingly “simple” (“hey there’s only a few wires right?”) should actually only be performed by either a professional technician or by an enthusiast with a minimum of Electronics 101 knowledge, including the ability to read schematic diagrams, an understanding voltages and polarity, etc. This is the advice directly from Mercury Magnetics™.
The transformer includes a wiring diagram sheet listing the color-coded primary and secondary wires, and these may not necessarily match the wiring in your amp. Mercury Magnetics™ also warns that installers put safety first, as there are literally hundreds of AC volts that can come off of the primary. A typical technician will charge 30 to 90 minutes of labor for the installation, which can average anywhere from $50 to $150.00. Prices and the time required to install an output transformer can vary from technician to technician.
*Installation tip: anyone planning to replace both the output transformer and circuit board may want to remove the old circuit board and output transformer first and then mount the new transformer. Then you can install the point-to-point board and not have to mess with it later to get at the output transformer mounts.
After some time and with the transformer installed, it was time to play! But first, a few minutes with the badge-logo JTM-45….
Taking a Classic for a Test Drive
The original badge-logo Marshall JTM-45 is truly an example of a wonderfully responsive guitar amplifier. In its best state, it can provide a range of tones that vary between the liquid and thicker lead tones of early Clapton, to the warmer side of the Marshall crunch a la AC/DC that we all know and love. The vintage badge-logo JTM-45, that we have the good fortune of borrowing courtesy of our good friend Woody (thank you!), had recently gone through a full check-up through southern California’s own Plexi Palace, so we knew that it was in fine form.
And it certainly sounds like it. No other Marshall seems to be as well suited to provide such a wide tonal range as well as being able to provide a feel with beautiful harmonics and compression as a JTM-45 circuit. The sense of dynamics that can be controlled with one’s technique was right on the money. This JTM-45 plain and simply is THE ultimate blues and rock amplifier.
 It stings and bites as musically as one could imagine with a Fender Stratocaster using the bridge position pickup with the Marshall’s channels bridged and the volumes set at about 7. With the neck pickup, the tones are fluid and with a bit of a gain boost from a floor box could easily capture the full sustain similar to what a player like Eric Johnson would get. The power output on the amp is moderately high, but at the JTM’s power range, it really is a nice match against any solid-hitting drummer and the perfect club amp for small and mid-sized venues.
With a Gibson Les Paul in hand loaded with LegendaryTones.com’s current favorite Seymour Duncan Antiquities and running the badge-logo JTM-45 through a basket weave Marshall cabinet (NOT the cabinet photographed here which is an earlier pinstripe) with original 25 watt greenbacks, the tone of the bridge pickup was pure AC/DC circa “Powerage” when running the volumes at about 6. With the volumes set at 7, the added gain and thickness moved into “Highway to Hell” territory. Switching to the neck pickup provided a wallop of a fat tone that seemed like it could sustain for days. Think early Cream here.
Listening in on the reissue JTM-45
After that experience with the 1964 badge-logo JTM-45, part of me didn’t want to turn the amp off, but alas it was time to move to our modified reissue. Running the same controls (and in fact the same tubes were used and setup in both amps) and equipment, I started playing the reissue with the Strat first. The immediate first impression: the reissue JTM-45 felt great – the same feel of compression and control of the dynamics was there. And there was also a noticeable improvement between the circuit since the change of both the output transformer and SoZo caps. Besides having a bit more power and punch in the signal, these changes really seemed to smooth out the reissue JTM-45’s tone and were definitely much more pleasing to the ear.
But specifically what were the differences between the reissue and the original? Well, the modded reissue stood out with a bit more attack in the high frequencies. It’s definitely a bit of a brighter amp than the 1964 badge-logo, but not by a great deal and not bright in such a way as to be “piercing.” The reissue JTM-45 could definitely mimic the original with a simple reduction of presence and treble controls and it did very well. Also, both SoZo Amplification and Mercury Magnetics™ told us that there is a break-in period for the parts to obtain their final adjusted tone. Again, for the SoZo caps, its 40-70 hours, and Mercury Magnetics™ stated the average break-in period should be a minimum of 20 hours of hard playing time with its transformers.
All said, we couldn’t wait that long nor did we have the time to play continuously to then report on the changes, but maybe we’ll add a brief report in the future after the break-in period.
When switching to the Les Paul with the newly transformed JTM-45, the same characteristic bold crunch with a warm full bottom end was evident. The modified reissue JTM-45 is definitely smooth when overdriven and power chords are a thrill to bash out in AC/DC style. Leads in both pickup positions of the Paul sang nicely. The neck position is always powerful with the JTM-45.
Final Thoughts….
In both amps, the feel, sustain, and tone was tremendous. The reissue in its current form has a little bit more of a faster attack, while the original badge has a bit more of a relaxed sag to it characteristically. It’s also a little bit darker. That said, we expected differences especially considering that each amp’s circuits are not identical. But what they do both share together is the original Marshall tone that we grew up on and know and love. And the fact that this tone can be captured without the need to hunt down a costly original is a nice thing for players indeed. There is something to having an original — it’s a testament to a wonderful period of musical history that NO reissue would ever be able to capture from that perspective. But at the same time, one thing that the reissue has going for it in its favor is the fact that most players would feel much more comfortable taking it out to a gig or the all-night jam. I would be a bit paranoid taking out the original personally.
It’s a shame that some of our greatest musical instruments, whether we’re talking about a ’59 Les Paul or an original Marshall amp, are so highly-valued in this day and age that it’s difficult to “enjoy” playing them. However, isn’t it a nice thing that companies such as those featured in this article are so passionate about their products and in finding ways to empower musicians with great tonal solutions today? I’ve said it before — we’re definitely living in times of a tonal renaissance with the options we have and the number of great instruments, effects, and amps that we have available to us.
And though some people may say that, “they don’t build them like they used to,” I would actually agree. In the case of these dedicated companies and people, I believe they’re in fact building them better than they used to with care and meticulous detail that may not have always been present back in the day.
Source: https://mercurymagnetics.com/pages/news/LegendaryTones/LegendaryTones-02.htm

We told this was coming.. Tes, when readers ask us to review something, we do our best to respond, and thanks to RedPlate founder Henry Heistand, we received two RedPlates for review. We’ll start this episode by telling you that Henry Heistand appears to be a very clever fellow who is not working in the shadows of that past, which is to say that he builds feature-rich amplifiers that in no way pretend to be vintage knock-offs. Play a RedPlate and you’re firmly treading in the present, rather than mining tone out of a dusty box built by a dead man (or woman—sorry Lily). And that’s fine. There is certainly ample space in these pages for the living, and RedPlates are in fact very lively tools indeed. We asked Henry to give us a glimpse into his background and motivation, and our reviews of the TweedyVerb and BlackVerb follow….
TQR: How and when did you initially become involved in electronics and amplification?
HH: Starting around age 12 playing to the radio and jamming with friends, my first build attempt was a speaker cabinet made out of ½ plywood and covered with yellow carpeting. It had a leopard (spotted) grill cloth and contained 6 speakers recycled from various old TVs and stereos. My first real amp repair was replacing a screen resistor in a Fender Bassman in 1970. I went to college for a year and then played guitar full time until 1979 when I attended electronics school (they still taught tubes). To pay for school I got a part time job at a church organ repair shop that had a “combo” repair department and still played in club bands on weekends. Attending electronics school in the morning and repairing gear in the afternoons was a great way to instantly translate the classroom to the real world. Compared to the tube TVs and tube broadcast transmitters, the tube musical amplifiers were relatively simple. Besides Fender and Marshall, tube amps by Sunn, Ampeg, Gibson, West, Park, Hiwatt, Sound City and all the Supro/Kalamazoo/Dan Electro stuff. If I only had a nickel for every good tube I tossed in the trash back then. Many of those same companies had solid-state amps too along with companies like Acoustic, Kustom, Peavey, Randall, Lab, SG and Roland. It seems like the ’70s was the golden era of guitar amp designers. Although most tube amps have a similar topology, the differences between brands in those days ranged from truly innovative to laughable. On a few occasions when a solid-state repair would come in that was totally fubar, one of the church organ repair guys would show me how to design a new circuit right over the top of the problem area, teaching me the value of having a few simple circuit designs at the ready for emergencies. In late ’82 I got a career job in the computer field, and by ’86 purchased the part of the church organ repair shop that repaired the “combo” gear. The new company was named Music Mechanix and kept the warranty contracts with all the majors for amps, keyboards and P.A.s.
TQR: As you became more familiar with various amp designs of the past, what were your favorites and why?
HH: Thinking back to the tonal memories accumulated during those years spent repairing amps, the most musical of all of them were probably the early ’60s Fender tube amps. In addition to repairs, Music Mechanix did all the popular mods of the day (anyone remember the original Train Wreck Mod pages for Fenders?), many times we would redo almost everything inside but keeping the exterior unchanged. Most of my playing back then was strictly radio cover songs so the quest was always to find the one amp that could imitate everything. Music Mechanix was continuing the warranty station status from the previous owner (established in the ’50s) so every original manufacturer’s amplifier schematic ever released was available as a reference source, residing in 16 large file cabinets. On the side, I kept a little notebook of circuits and mods of interest to use as building blocks.
TQR: Can you describe the lasting impressions created by your study of the experiences with classic amps that have most affected your own design philosophy and preferences?
HH: As a service to friends and regular customers Music Mechanix would take a classic amp (at the time it was easy to get something like a used Bassman for $100) and do Frankenstein amps that were Fender this, Marshall that, with a sprinkling of Vox and Ampeg thrown in depending on the customer’s needs. On the weekends I was doing gigs using a pair of modified Ampeg VT-40s in stereo until somehow I ended up with a Mesa Boogie S.O.B. that had a really innovative phase inverter section controlled by a “LIMIT” knob. A bizarre variation of a PI section’s constant current source, the circuit was not in the RCA manual or on any other schematic. It sparked something in me and from hen on I started doing creative amp mods that were not copies of things I had seen on schematics.
TQR: When did you first begin to sketch out the concept for RedPlate amps, and what did you want to accomplish that would be unique and different?
HH: I had always been fascinated with “sleeper” amps that looked small but sounded big. After selling the repair business I used my free time to do a lot of experimentation on point-to-point builds in a Fender Camp sized chassis, eventually working out how to do a 7 tube, large transformer build in a Champ chassis without noise or oscillation. My favorite guitar tones were the recorded sounds of the Mesa Boogie/Dumble ODS type amps (even before I even knew what a Dumble amp was). A clean singing tone with a hint of character that sustains and blooms is my idea of the ultimate tone and the design goal of all the RedPlate models.
TQR: Can you briefly describe the unique features and differences among the current line of RedPlate models?
HH: RedPlate probably has too many models because we treat the sections as modular building blocks. We start with one of the 3 chassis sizes:
CH1. 15” width with four 9 pin sockets and two 8 pin sockets, transformers up to the 50 watt size.
CH2: 17” width with six 9 pin sockets and two 8 pin sockets, transformers up to 80 watt size.
CH3: 19” width with five 9 pin sockets and four 8 pin sockets, transformers up to 160 watts
Then we use different combinations of the building blocks with the only limitation being the number of controls (physical knob space) and the number of tube sockets available. Building blocks currently in use:
BB1. PREAMP1—Tweed—A single tone knob preamp (Tweed style).
BB2. PREAMP2—Blackface—A Treble, Middle, Bass Preamp (Blackface style).
BB3. DRIVE1—A three knob overdrive section (Gain, Drive, and Level).
BB4. DRIVE2—A six knob overdrive section (Gain, Drive, Level, Treble, Middle and Bass).
BB5. REVERB—A single knob tube reverb with medium decay tank.
BB6. EFFECTS LOOP—A fully buffered serial loop, return level is the master volume.
BB7. PHASE INVERTER—Standard Long Tail pair, very similar to the early ’60s designs.
BB8. POWER AMP #1—40 watts cathode bias (6L6GC).
BB9. POWER AMP #2—50 watts fixed bias/40 watts cathode bias (6V6GC)
BB10. POWER AMP #3—80 watts fixed bias (KT-88).
BB11. POWER AMP #4—45 watts fixed bias/18 watts cathode bias (6V6GTA)
BB12. POWER AMP #5—100 watts fixed/50 watts fixed (6L6GC).
TQR: Both of our review amps are loaded with Warehouse speakers from Kentucky, which we have reviewed before. How extensive are your evaluations of various speakers when creating a new model? Does the same process apply with transformers, tubes or other components?
HH: The current lineup is using WGS Retro 30, WGS British Lead 80 and Eminence Swamp Thang speakers in the combo amps. The decision to use these was based on side-by-side comparisons with other brands (an ongoing process).
Tube selection is mostly based on reliability (as long as the tone is still there). The current production amps use Svetlana 6L6GC, SovTek 12AX7LP (PI tube), and Electro Harmonix 6V6GTA and 12AX7s (preamp).
Selecting individual signal path components is more difficult because side-by-side comparisons can be misleading (no 2 amps are exactly alike). The signal path in current production amps use PS series Orange Drop capacitors and carbon film resistors based on low noise and musical warmth in the tone. RedPlate Amps has a good relationship with Mercury Magnetics and I like to use their transformers in most models.
TQR: How does the half power switch function in your amps, as well as the “mode” control and various voicing controls?
HH: Depending on the output section, 3 methods are used:
1. 6L6GC 100 watt/50 watt—The switch lifts two of the four tubes by 10K so they are effectively out of the circuit yet the impedance selection is still valid.
2. 6V6GTA 45 watt/18 watt—Full power runs two of the tube in cathode bias and two in fixed bias, the switch lifts the fixed bias tubes by 10K to effectively remove them without changing the output impedance.
3. 17 Watt (Hi/Lower)—This switch just lowers the voltage to the phase inverter tube so the amp breaks up sooner. There are two different styles of mode switches. On the Tweed style preamps the 6 position mode regressively reduces midrange and preamp output to imitate a Blackface style amp. On the Blackface style preamp the 6 position mode switch progressively fattens the midrange to imitate a Tweed style amp. Most of the models also include a Humbucking/single coil switch to set the amount of bass gain in the input stage.
TQR: How much individual customization or voicing do you offer for specific models when working with an artist?
HH: Unlimited customization is available, although most of the professionals that use RedPlate Amps are content playing standard models.
TQR: We noticed that you include the owner’s name on the back panel, correct? A nice touch…
HH: Yeah, the front and rear panels are done in-house, we could even put pictures of your dog on there.
TQR: What do you want to accomplish in the future? New models?
HH: “Amps that sing” being every guitar player! Going forward, curiosity and customer feedback will continue to drive the evolution of current designs and the development of new designs. For example, there will be a “shredder” amp in the near future (The ShredPlate) and possibly a bass amp. As RedPlate continues to gain name recognition with the music industry, models like the BlackVerb, MagicDust and TweedyVerb will hopefully be taken for granted as standard amplifier types.
The front and rear panels on the BlackVerb reveal an impressive array of controls, push/pull-knobs and switched pots. In fact, the printed operation guide includes a signal path diagram on the front page with a welcoming invitation to skip an in-depth review of the manual and just set all the knobs at 12 noon and play, which we did, consulting the manual as needed as we spent more time with the amp. So, is the BlackVerb too complicated for you “plug & play” guys? Not really, but the control panel is best reviewed in sections. You’re essentially working with a clean preamp circuit and a Drive section that includes Gain, Drive and Level controls for variable levels of distortion overdriven tones, but there are still many more additional tweakable features lurking within…
The first control adjacent to the single front input jack is the miniature Bright switch toggle with the center position OFF, Down producing the sound of “new strings” (an accurate description we might add), and Up rendering a brighter tone that will be familiar to those of you with a Fender Blackface amp with bright switch. We usually use the bright switch to put a little extra shimmer and spank on humbucking pickups, or neck pickups on single coils.
The Volume control includes a pull switch to engage a midrange boost that increases upper mids. The Middle control does what you’d expect, with a pull switch for a “Deep” setting that scoops mids and boosts bass frequencies—an excellent change-up for clean tones. The Bass control handles low end quite well, and it can be clicked OFF to be removed from the tone stack. Try that with a neck pickup and it produces the odd and very different EQ found in some old Valco and Gibson amps.
The Mod Selector is a 6-position rotary EQ switch that gradually produces a fatter, thicker tone as you rotate left to right from the “Funk” setting, to “Normal” and “Fat” (tweed). All this pulling and turning may sound complicated, but you’ll have it thoroughly digested in 5 minutes, and most importantly, these extra EQ controls expand the tonal capabilities of the BlackVerb in a clever and creative way that really is worth using and exploring. We have bitched about such bells and whistles on other amps having limited value, but no such questionable affectations plague the BlackVerb. Like we said, Henry is a clever fellow. On the Drive section…
This is where you mine and manage overdriven tones and distortion. The Gain control can be bypassed by clicking fully left, otherwise, you’re setting the amount of signal being sent to the first gain stage, which produces variable levels of smooth growl and grunt. The Drive control further ramps up distortion through two gain stages, and a pull switch on the knob serves as an afterburner for maximum burn and rip. At this point you will be channeling Metallica at full husky, so hide the dog. The Level control sets the output volume for this section, resulting in a progressively bigger, thicker, bolder voice. Of course, the big selling point for the BlackVerb is how all of your clean, moderately busted up and filthy dirty tones can be deftly tweaked and the volume managed with the Volume and Master volume controls. At the full power setting, you really can get this thing to sound like a 100 watt high gain amp on “7” at low decibel levels suitable for home recording and friendlier sound pressure levels.
The reverb control is what it is, and you can turn it off fully left and it’s out of the circuit. The Presence control is described as using “global negative feedback to remove low frequencies which frees up bandwidth for more midrange and highs,” and it can also be turned off when rotated fully left. Frankly, the appeal of this control escaped us, but we can imagine how it might be useful in a live situation where you may want to avoid too much low end muddying up the mix with bass and drums. The Master volume works very well without producing the dreaded master volume/low volume faux zizzz when you’re trying to light a fire at low volume levels.
One of our favorite features is the 50 watt/40 watt switch on the back panel that changes the boas from fixed to cathode for a completely different feel. With the 40 watt cathode biased setting you can also change the 6L6 output tubes to 6V6s, transforming the BlackVerb into an 18 watt cathode biased flame thrower, or bypassing the Gain section for a more tweedy character and voice. The Hi/Lo power switch changes the voltage on the input stage and the threshold for clean headroom.
The back panel Smooth switch is just that, adding slight compression in the clean preamp, and the Humbucker/Single Coil setting sets the amount of bass gain in the input stage, relieving you of perhaps resetting EQ when switching from single coils to humbuckers.
Additional utilitarian features on the back panel include a handy bias adjustment and test point, speaker impedance selector, main and extension speaker jacks, FX send and return, and footswitch jack. The footswitch gives you the capability to get in and out of the Tweed, Drive and Boost circuits. Tweed boosts upper mids while lifting the midrange control on the front panel for maximum push in the frequencies where the guitar really lies on stage. Drive engages the Drive feature, bypassing it when off at the footswitch. Boost makes everything sound bigger with a partial tone stack lift.
And now for the bottom line…. It seems to us that the intention of the BlackVerb is to be as tonefully versatile as a 1×12 combo amp can possibly be whether you are playing small clubs, bigger rooms or wide open outdoor stages. You could play nothing but smooth, clean jazz through this amp without ever venturing into the gain stages and be perfectly happy. Or you could do nothing but feast off the considerable gain and distortion lurking in the heart of the BlackVerb and be equally happy. Most gigging musicians want to range between such extremes living somewhere in the middle, and you can do that, too. Like most feature-rich amplifiers, you’ll find certain favorite settings that will be revisited with specific guitars, and after a few days you’ll have no trouble quickly accessing those settings, although the control panel is a bit difficult to read until you no longer need to read it at all.
The standard Warehouse Retro 30 speaker is a brighter version of the Veteran 30 we have favorably reviewed in the past. Given the considerable range of overdrive and distortion available in the BlackVerb, the Retro 30’s clear, articulate character and exceptional capacity to handle low frequencies makes it an excellent choice for this amplifier. Even at extreme gain and drive settings, the BlackVerb produces a rich and musical burn that does not mask or obscure essential overtones and harmonics. The clean tones are equally strong, powerful and clear, and the amp will nimbly spill into overdrive played clean at higher volume levels that can be managed with the volume on the guitar. The BlackVerb impressed with its ability to embody many different styles of amplifiers in one compact box, limited only by your capacity for experimentation and your imagination. Imagine that.
We were particularly anxious to experience the TweedyVerb because it seems to fit the power and volume requirements of so many players today, and it is a very straightforward and versatile 1×12 combo that is a breeze to hump to the next gig. Got your attention there, did we? We finally figured out why vintage blackface Pro Reverb amps have remained relatively underpriced… just pick one up.
The TweedyVerb is a cathode biased dual 6L6 amp with reverb, loaded with an 80 watt Warehouse British Lead 12” speaker. You won’t find a bad tone in this amp, and the controls are very intuitive, delivering outstanding “blackface,” “brown” and “tweed” tones via a 6-position Mode switch. The Bright switch is identical to the BlackVerb (you’ll love the “new strings” setting), with a single Volume control, simple Gain control, and a Tone control that can be clicked off fully left to bypass the tone stack for a very heavy and thick does of overdriven tones with excellent dynamic feel and touch sensitivity. The spring reverb is good—delivered form an original new old stock Accutronics pan made by Cary, IL, and the Presence control is identical to the BlackVerb, using global negative feedback to remove low frequencies and emphasize mids and highs. It also seems to decrease volume and gain, best used in our opinion for clean tones.
The 40 watt/17 watt switch on the back panel changes the voltage on the phase inverter. We preferred the sound and girth of the 40 watt setting, which still allows plenty of room for managing volume and variable distortion with the Gain and Volume controls, but the 17 watt setting is fine, too for close quarters. 6V6 power tubes can also be used at this setting without re-biasing for lower power output and volume. A footswitch is included to access both the fat Tweed setting on the Mode switch on the fly, and the Boost function, which acts as a tone stack bypass. Despite its compact size and relatively light weight, the TweedyVerb is a big-sounding amp that produces outstanding clean tones at usable stage volume, yet it can also be gradually pushed into the familiar sound of a Deluxe Reverb on “6” or even a vintage Marshall head at higher volume and gain settings. It’s a right fair chameleon, this one.
The Warehouse 80 watt British Lead 12 gracefully handles the power output of the TweedyVerb with excellent clarity, sold bass, vivid mids and a sweet and chimey top end. Like the BlackVerb, the TweedyVerb offers the sound and feel of several distinctively different amps in one box via the Mode switch, and we liked them all, from the rough and tumble Tweed, the slightly less raucous, smooth upper mid voice of the Brow, and the more scooped, open and airy Black settings. Both RedPlate models reviewed here clearly share the same DNA, which is to say that they possess a remarkably rich and music character, whether you choose to stroke big clean tones through them or dial up a tone that would make Billy Gibbons proud. Douse that light, and Quest forth….
We always maintain a steady flow of gear arriving for review, but sometimes we also employ a fascinating if time-consuming research strategy that involves logging onto eBay, picking a broad category such as “guitar amplifiers,” and settling in for as long as it takes to patiently scroll through every page of listings. Yeah, that’s often 50 pages or more, but since we can’t possibly think of all the items that might interest us and search for them by name, it’s far more revealing and productive to just hunker down and scroll. Rarely do we fail to find something intriguing that would have otherwise been missed, and such was the case on a morning in August when we stumbled on a listing for a 1959 tweed Deluxe. Were we looking for a tweed Deluxe? Nope. Wouldn’t have crossed our mind at the time…. We had already reviewed 5E3 reproductions from Fender, Clark and Louis Electric within the past 3 years, and we have frequently referenced our 1958 Tremolux as being our desert island #1. Isn’t a Tremolux just a tweed Deluxe with tremolo in a bigger box? No… not even close. That would be like saying you wanted to date a blonde – any blonde. For the record, our fixed bias Tremolux possesses a cleaner tone with a bigger, booming voice created by the taller Pro cabinet. The Two Fifty Nine is a completely different animal….
Sporting a February 1959 date code on the tube chart, the ’59 had been listed by a seller in Arkansas who turned out to be Tut Campbell, formerly a well-known guitar dealer in Atlanta. Still buying and selling gear, Campbell had described the Deluxe as being in original condition with the exception of a replace output transformer – a big old mono block Stancor dating to 1957. Given the otherwise original condition of the Deluxe, which included the Jensen P12R, we made Campbell a “best off” below his asking price and scored the amp for $1,850 shipped. We wouldn’t say we stole the Deluxe, but it seemed a fair price of admission for the opportunity to experience and explore still another rare classic and supremely worthy piece of Fender history on your behalf.
The Deluxe arrived with the big Stancor dangling from the chassis despite Campbell’s careful packaging. Wasn’t his fault, really – in a feeble effort to avoid any additional holes being drilled in the chassis, the fellow who installed the Stancor in the ’60s had merely tightened set screws over the small tabs at the base of the heavy tranny, which was designed to be mounted upright – not hanging upside down in a guitar amplifier. Of more concern was the fact that while the amp was lighting up, there was no sound…. Well, we’ve been here before, so we made a call to God’s Country and the Columbus, Indiana domicile of Terry Dobbs – Mr. Valco to you. We had already set aside a spare output transformer (Lenco, McHenry, IL) that had been the original replacement installed in our ’58 Tremolux when we first received it, replaced with a Mercury Magneticsfor our June ’07 review article. Mr. Valco cheerfully answered his phone and as we explained the situation with the Deluxe he agreed to walk us through the installation of the new replacement – a simple process involving four lead wires being connected to the rectifier and output tube sockets, and the speaker jack. As long as you put the correct wires in the right place, a piece of cake, and we had the new tranny in within 10 minutes. Pilot lamp and all tubes glowing, still no sound…. Valco patiently guided us through a series of diagnostics with the multi-meter and the Deluxe was running on all cylinders, pumping 380 volts. Stumped, and with the hour growing late, we called it a day. Leaving the mysteriously neutered Deluxe chassis on the bench until tomorrow.
Morning came with a whining voice delivering a plaintive wake up call – “It’s got to be something stupid and simple….” Inspired by a huge steaming mug of Jamaican High Mountain meth, we sat back down at the bench, tilted the innards of the Deluxe chassis forward beneath a bright halogen desk lamp and peered in for answers. We began slowly examining the chassis in sections, looking for broken or dull solder joints, loose or broken wires, while gently pushing and prodding wires and connections with the eraser tip of a #2 pencil as we had seen Jeff Bakos do so often at his bench. After ten minutes or so we were about to give up, when we turned our attention to several places where the circuit was grounded to the chassis adjacent to the volume and tone pots, and damned if a solder joint for one of the uninsulated ground wires hadn’t separated from the chassis. No ground, no sound, and as soon as we had restored the solder joint the Two Fifty Nine arose from the dead with a mighty A major roar.
The amp was indeed remarkably well-preserved in all respects, with the typical amber patina of old tweed. The burnished chrome control panel remained bright and clean with no corrosion, the original handle remained intact, and a couple of small ciggie burns on the edge of the cabinet added a stamp of historic legitimacy to the Deluxe’s pedigree. The top half of the Jensen’s frame was coated in a fine film of red clay dust from the Delta, and while the cone was in remarkably good shape with no tears, an audible voice coil rub called for a recone. We would send the speaker to Tom Colvin’s Speaker Workshop in Ft. Wayne, Indiana, requesting that he leave the original unbroken solder joints for the speaker wires intact if possible.
Meanwhile the first order of business was to listen to an assortment of NOS tubes from our stash, and audition no less than a half dozen speakers. Different sets of power tubes and individual preamp tubes will sound surprisingly different, so we started out with a matched pair of NOS RCA 6V6s, a GE 5Y3 rectifier, and an RCA 12AX7 and 12AY7. From there we subbed in a dozen different RCA, Amperex, Tesla and GE 12AX7s, noting varying levels of brightness, warmth and intensity among them all. For an edgier, more aggressive voice, the GEs and Amperex typically deliver the goods, while RCAs produce a slightly warmer, richer, fuller tone. We also experimented with a 12AT7 and 12AX7 in place of the lower gain 12AY7, and while those tubes ramp up gain and distortion faster and with more intensity than the 12AY7, they seemed like overkill for us. Our Deluxe possesses a tone of gain using the stock 12AY7.
Rather than repeatedly reloading the Deluxe with different speakers, we used a Bob Burt 1×12 cabinet built from 100-year-old pine for our speaker tests. The original Jensen had never been pulled from our amp, but multiple speaker replacements in an old Fender inevitably cause the speaker mounting screws to loosen in the baffleboard, making speaker swaps unnecessarily clumsy and complicated. When we do run into loose mounting screws, we simply run a few small drops of Super Glue around the base of the screw and surrounding wood. Allow to dry and your screws will stay put provided that you don’t torque the nuts on the mounting screws like an idiot with a socket wrench. Don’t be that guy,
We tested a range of speakers that included a Celestion G12H 70thAnniversary, Colvin-reconed ’64 Jensen C12N, Eminence Wizard, Private Jack, Alnico Red Fang, Teas Heat, Screaming Eagle, Red, White & Blues, and Warehouse Green Beret, Veteran 30, Alnico Blackhawk and Alnico Black & Blue. The Alnico speakers generally produce a tighter, smoother, slightly more compressed tone, with a variable emphasis on upper mid-range and treble frequencies, while the speakers with ceramic magnets possess a wider, more open sound. Higher power ratings of 75W-100W offered by the Red, White & Blues, Screaming Eagle and Warehouse Blackhawk typically translate into more graceful handling of bass frequencies, and in a 20 watt Deluxe, zero speaker distortion, for a clean, powerful voice.
Let’s cut to the chase with speaker evaluations, shall we? It has become clear to us that even after reviewing a dozen speakers in as much detail as mere words allow in a single article, many of you remain uncertain about which speaker to choose. No kidding. We would absolutely love to hand you a single magic bullet when it comes to speaker swaps, but here’s the dirty little secret about choosing speakers…. The overall character of the amp you will be installing your new speaker in is critical, and to some extent, the type of guitars and pickups you play most often are important, too. Tailoring your sound with the unique gear you play is not a one-size fits-all proposition – you have to invest some thought into the process. Are you going for a classic “scooped” American Fendery tone, or something more British, with a bit of an aggressive edge and upper midrange voice? Are you playing guitars with single coil pickups or humbuckers? Is there a specific, signature tone you are searching for, or are you playing a wide variety of musical styles that requires a broader range of tones? Do you like the more open sound of speakers with ceramic magnets, or the smoother compression of Alnico? What are you not hearing from your amp and the speaker that’s in it now? Do you want a brighter tone, darker, better bass response, or fuller, more prominent mids? Do you want to really drive the speaker and hear it contributing to the overdriven sound of your amp, or do you want a big, clean tone with no speaker distortion in the mix? The truth is, if you don’t know what you want, you are far less likely to get it. On the other hand, nothing is accomplished with paralysis by analysis. To be perfectly honest, there are lots of speakers made by Celestion, Eminence, Warehouse and, if you can wait long enough for them to break in, Jensen, that we could and would be perfectly happy with, but we would also choose them carefully, taking into account all the factors mentioned above. After a couple of days spent swapping speakers, we ultimately concluded that we preferred the ’64 C12N for a classic tweed Deluxe tone, and a broken-in Celestion G12H 70th Anniversary for the most mind-altering 18 watt Marshall tone we have ever heard. Seriously. More on that in a minute….
Having split more than a few hairs with our speaker swaps, it was time to start picking nits off of gnats with some output transformer evaluations. We first contacted Dave Allen of Allen Amplification, who also stocks Heyboer transformers built to his specs. We found a variety of appropriate output transformers on Allen’s site that offered subtle variations on a stock original Deluxe OT, and we asked Dave to describe the TO26 model we wished to try in the Deluxe:
“The TO26 was intended as a hot rodding upgrade to a stock Deluxe Reverb OT. While maintaining the stock 3-1/8” mounting centers, its fat stack of hotter core steel and multi-tap secondary make it a good choice for builders wanting to maximize the performance of a pair of 6V6s and who may also want to push the envelope with 6L6/5881s while still being able to clear the speaker in a stock cabinet. There are physical limitations in small amps, so its short low profile is welcome. The orientation of the laminations is also good for low hum pick up from the power transformer. I found that an OT mounted the tall way (like my TO30D) picks up considerably more hum simply due to its orientation to the power transformer, so, shoe-horning a ‘tallish’ OT into your amp may cause it to pick up hum from the power transformer – not much of an upgrade. “The TO26’s 7K to 8 or 16 ohm rating makes it ideal for a pair of 6V6s as well as 3,500 ohm to 4 or 8 rating for 6L6/5881s. Notice you always have an 8 ohm option with both types of power tubes. An impedance switch could be wired (I use a blackface grounding switch) as a power tube type selector for an 8 ohm speaker to go between 6V6s and 6L6s. The TO26 will typically give slightly more output with 6V6s due to its more efficient low-loss core steel and will keep the bass clean longer for more perceived clean headroom. As it takes the most watts to reproduce the bass, you notice distortion there first, and since Fender-type amps are so bass heavy, you can quickly hit the wall with headroom, so a noticeable increase in clean bass response certainly feels like a more powerful amp with the TO26. It is kind of like you installed a new speaker with a larger ceramic magnet that is more efficient than the old speaker. The amp is a little louder and the bass a little tighter or cleaner.
“There seem to be a lot of 6L6-based 5E3 amps out there now to get a little clean headroom from a circuit normally not known for much of that. The TO26 is a good choice for that type of amp as it will fit typical available chassis and cabinets. It has extra long 12” topcoat leads ready to strip and solder. I would reckon it would handle up to about 30 watts before starting to saturate and compress – plenty of cathode-biased 6L6s. I find that the Heyboer paper stick-wound and interleaved output transformers with premium core steel and heavy core stacks have typically better clarity or definition than ‘stock’ OTs. Call it fidelity or whatever you want – just clearer distorted and complex tones and better separation of notes in chords, etc. I use the TO26 in the Allen Sweet Spot, Accomplice Jr. and Hot Fudge with Nuts amps with excellent results. All of these amps can use either 6V6 or 6L6 power tubes. You know how a 5F6-A or Super Reverb has that huge 4 bolt OT for a pair of 6L6s to get the maximum clean bottom end? That is sort of what the TO26’s OT is to a pair of 6V6s. It just doesn’t even come close to saturating.
When we informed Dave that we planned to run the Deluxe with 6L6/5881 power tubes as well as 6V6s, he recommended that we try the TO26 since it had been specifically designed for such applications. He also sent a smaller TO20 transformer, described as being designed with a wider 1-1/4′′ lamination “fat stack” that provides 60% additional core mass than typical ¾′′ stack units for improved performance. The TO20 is a direct replacement for Blues Jr. and Princeton Reverb amps, and also suitable for dual EL-84 amps with an 8 ohm load.
Mr. Valco also sent us a replacement 5E3 output transformer he had bought on sale from Clark Amplification a few years ago made for Mike Clark by Magnetics Components in Schiller Park, IL – a company that has been producing transformers since 1943, having been the primary supplier for Valco and various Gibson amps in the ’50s and ’60s. A call to the company revealed that ToneQuest ReportV12. N1. Nov. 20104the transformer Valco sent was essentially their replacement for a Deluxe Reverb, model #40-18002 without bell ends per Clark’s request. We also learned that the company offers a complete range of Classic Tone vintage power and output transformers, including a reverse-engineered clone of a ’55 Triad 5E3 output tranny, model #18022.
We also contacted Paul Patronete at Mercury and requested a ToneClone “brown Deluxe” output transformer, since Larry Cragg had provided them with specific measurements from original OT in Neil’s ’61 tweed Deluxe, confirming that it was indeed a ’61–’62 brown Deluxe tranny. With a total of 6 output transformers to listen to, we took the Deluxe to Jeff Bakos, who set up a rig on his bench that enabled us to clip in each transformer and very quickly switch back and forth between them as we played a guitar through the amp. Are we having fun yet? Here’s what we heard:
Lenco – An excellent authentic “vintage” vibe for those that prefer the classic, if somewhat murkier sound of a tweed amp being pushed, lots of sag in the low end and a jangly pop in the top. And “old,” rather “lo-fi” sound indicative of the ’50s era amps.
Magnetics Components Clark Deluxe 18002 – Similar to the Lenco, but stronger and more robust, with a prominent growling character and voice. Thick, wooly and willin’ with better treble presence and clear string definition then the Lenco, yet an entirely “vintage” character. This tranny is comparable to those found in Deluxe amps from the brown era through silverface. Excellent power, punchy and fat with exceptional clarity and tone.
Magnetic Components 5E3 Clone – Percussive and dynamic with a faster attack response than the Clark/Deluxe Reverb version, this transformer was reverse-engineered from an original ’55 Deluxe OT. IT imparts an intense, throaty tweed character with enhanced mid and treble presence, remarkable clarity, and an authentic vintage ’50s vocal tone with softer bass response and slightly less volume and power than the Deluxe 18002.
Allen/Heyboer TO20 – An interesting variation with a much more modern, percussive dynamic character. The sound was not as heavy and imposing in the vintage style, and with this transformer the Deluxe reminded us of the more refined sound of a Fender Princeton, with excellent dynamic punch for slide and Allen/Heyboer TO26 – As advertised, the low end held up loud and proud with very little sag and an audibly higher threshold of clean headroom, although beyond 6 on the volume control the Deluxe was still holding nothing back. Overall, this transformer imparts a cleaner, high fidelity tone with more clarity and stout bass response than a typical stock 5E3 transformer. An excellent choice for enhanced low-end and maximum volume.
Mercury Magnetics brown Deluxe – Immediately recognizable, the Mercury displayed a trademark sound that is smooth, exceptionally musical, warm and balanced. Sounding more “high fidelity” than the Lemco or Magnetic Components transformers, but still seductively unruly enough to get yer ya-ya’s out. Sweet, rich, detailed and sticky.
Now, you may be wondering why we would bother to audition so many output transformers…. How much difference can it make? Well, forty-odd years ago when someone rigged that old Stancor tranny in the Deluxe, the only choice available to most repair shops was whatever was on hand in the scrap pile. Today we can shape the tone and dynamic response of an amp with a variety of “vintage” or more modern, custom transformers that allow us to recapture the original sound and feel of the amp, or improve upon the original design. Why did Cesar Diaz install output transformers for a Twin Reverb in Stevie’s Super Reverb amps, and Bassman transformers in his Vibroverbs? Because the first thing that chokes and overwhelms a smaller output transformer are the bass frequencies, and Cesar wanted Stevie’s amps to produce a rock-solid, thundering low end that could handle his massive wound strings. The tone we’re celebrating with our ’59 Deluxe is quite the opposite…. The raucous sound of the amp teetering on the edge is the key to it’s exploding tone, but if you wanted to go in the opposite direction with more headroom and a tighter low end, transformers like the TO26 have been specifically designed for that purpose. We once replaced the output transformer in our Pro reverb with a bigger MercuryToneClone Bassman, and the Pro grained a tone of clean headroom and unyielding bottom. Wanna make it even harder still? Use a plug-in diode rectifier in place of the 5AR4 rectifier tube. No saggy britches now. As with so many choices we make in the Quest for tone, the final decision comes down to your mission and individual taste, and Jeff agreed that between the Heyboer TO26, both Magnetic Components trannies and the Mercury brown Deluxe, the question wasn’t which one was “best” – all four were exceptional, but different. Some players would prefer one over another for different reasons described here, but all of them represent stellar examples of just how far we’ve come since the day that old Stancor tranny was used to put the Two Fifty Nine back into service.
One last detail needed to be addressed…. Could we safely run the Deluxe with 5881s or 6L6s if we preferred that sound over 6V6s? Once again, we asked the prescient Mr. Valco for some Hoosier insight:
“The impedance mismatch in this particular amp using the 6L6s is really not a big concern, it won’t hurt the amp and will either sound good or it won’t. The 6L6s draw 1.8 amps and two 6V6s draw 0.9 amp, so using the 6L6s will add about 1 amp more current draw that the power transformer needs to supply from the 6.3 volt heater windings. On some small 6V6 amps, using 6L6s can and does cause the power transformer to run hotter because more current equates to more heat. The concern is that the power transformer in the Deluxe, not being a large one to start with, has the extra 1 amp of heater current capacity to safely use the 6L6s. One way to determine if the power transformer is really stressed out with the 6L6s is to measure the AC heater voltage on pins 2 and 7 on the power tube sockets (or on the pilot lamp) and see if the AC voltage drops significantly from the reading using 6V6s versus 6L6s. It should be a bit over 6.3 volts AC with the 6V6 anyway (since the wall voltage is higher these days than in the early ’60s) and with the 6L6s you sure don’t want to see a large drop in voltage below 6.3 volts AC. If there is a large drop it means the transformer is having trouble supplying enough current for the 6L6 heaters if given enough time with the 6L6s could damage the power transformer. If the drop is only a few 10th of a volt, and doesn’t go below 6.3 AC, then it would indicate that the transformer is supplying the demand for the heater current and should be OK. Most Fender amps used power transformers that could handle some extra current demand.
And now we arrive at the moment of truth. We’ve been steadily reeling in a parade of new and classic amps for review in these pages for 12 years now this month – Marshall, Fender, Magnatone, Hiwatt, Vox, Valco, Silvertone, Ampeg, Gibson, Gretsch, Mesa Boogie, Park, Supro, Dickerson, Traynor, Budda, Western Auto, Standel, Dumble, Cornell, Clark, Crate, Divided by 132, Reeves, Bad Cat, Gabriel, Fuchs, Koch, Star, Category 5, 65 Amps, Balls, Bakos, Callaham, Blankenship, Reinhardt, Grammatico, Siegmund, Chicago Blues Box, Roccaforte, Headstrong, Rivera, Mad Professor, Talos, Maven Peal, Reverend, BC Audio, Savage, Goodsell, Fargen, Carol-Ann, DST, Two Rock, Germino, Matchless, Louis Electric, Swart, Demeter, Juke, Aiken, Bluetron, DeArmond, Carr, Victoria, and Dr. Z, with more coming. Lots of amplifiers, multiple models from the same builders, and among the foremost classics – Fender, Marshall, Vox, Hiwatt, Gibson, Ampeg and the entire Valco catalog, we have acquired, optimized and restored dozens of amps considered to be among the most desirable vintage models ever built. In the 20 watt wheelhouse occupied by the Two Fifty Nine, it has no equal by a mile. Game over.
After a lot of back and forth testing with different sets of output tubes, we became hooked on the thundering sound produced by a pair of Philips small-bottle 6L6WGBs. Thanks to Larry Pogreba’s talent for scavenging rare tubes (in Montana, no less), we are flush with several outstanding and stout pairs of RCA 6L6s, but the brighter Philips really lit up the Deluxe with a fresh and lively attitude that mirrors the bounce of a newer amp. With the ’64 Jensen C12N loaded, the Deluxe spookily nails the tones of Neil Young’s rig on Ragged Glory – a “studio” recording cut live with the Deluxe and Old Black in a barn on Young’s ranch with Crazy Horse. With the volume backed off to 4-5 a bluesy jangle emerges anchored by solid low end, rich midrange, the sweetest treble tones imaginable, and variable levels of sustain and edgy distortion that can be controlled both by the volume on the guitar and pick attack. The Deluxe does not discriminate between single coils or humbuckers, ravaging both with equal fervor, and the responsive dynamic character of this amp simply is not of this world. Rotating the single tone control sharpens treble without dumping lows or mids, while also subtlety increasing gain, as if you were using a boost pedal. A “Y” cord plugged into the Instrument and Microphone inputs enables the two channels to be mixed with great effect. As Neil Young described, bringing the mic input volume up with the instrument volume set between 6-8 gradually deepens the tone while slowly igniting an intense explosion of thicker second order harmonics and distortion as the dynamic character of the amp softens. Pushing the Instrument volume level up into the 8-12 range brings the volume up to a perceived level that exceeds 20 watts, while provoking an angry, pissed-off cascade of astonishingly rich musical distortion as the notes swerve into controlled harmonic feedback.
Switching from the Jensen to the Celestion transforms the Deluxe into the most stunningly toneful 20 watt Marshall you could possibly imagine. To be honest, you probably can’t imagine it, because we have never heard anything like this ourselves, even after owning a couple of vintage Marshall PA20s, a rare Lead & Bass head and 1×12 cabinet, and a Balls 2×12 18 watt. We could easily live with either speaker, and the Deluxe also just kills pushing our 8 ohm 4×12 pinstripe cabinet.
For those of you who appreciate a somewhat tamer vibe, we can assure you that the Deluxe loaded with a fine pair of 6V6s is equally mind-altering. The overall sound is a wee bit smaller in girth and less imposing, yet abundantly overflowing with vivid harmonic depth, a supremely touch-sensitive response, and brilliant combination of fidelity, clarity and bloom. Compared to a black or silverface Deluxe Reverb, the ’59 presents a more musically complex soundstage, less harsh, stiff and linear, and it lacks both the sharper treble of a blackface amp, and the scooped midrange character. The tone is rounder and meatier, the treble sweeter and less dominant, with an enhanced 3-D image.
Now, if you’re the type that skeptically requires a qualifier to add a stamp of legitimacy to such an over-the-top review, here it is, Mr. Been There-Done That…. The Deluxe doesn’t and won’t spew big clean tones at stage volume. Our ’58 Tremolux produces a cleaner tone with a higher threshold of clean headroom by far at comparable volume levels, and the taller tweed cabinet encourages a stronger, cleaner resonant bass and low mid response. The Tremolux is also equipped with a Mercury ToneClone Tremolux output transformer, which creates a tone that is less wooly, raucous and indistinct.
The busted-up sound of the Tremolux above 5–6 is gloriously righteous indeed, but with more clarity and less provocative intensity than the Deluxe. Taken in context, what we’re suggesting here is that in our experience, the Deluxe has no equal as both a Fender and Marshall style 20 watt rocker (depending on speaker selection), and we’ll add “blues” to that description equipped with 6V6s and the Jensen C12N. During our 2-month test period, we also routinely used our Lee Jackson Mr. Springgy reverb, Analogman-modded Boss DD3 digital delay, and a very cool, versatile (and cheap) Flip tube tremolo pedal reviewed here. Can a modern replica of the 5E3 Deluxe deliver the same inspiring tones as the Two Fifty Nine? The closest thing we’ve heard is the Louis Electric “Buster,” but no, magical happy accidents like this Deluxe can’t be reproduced today – and that is as it should and shall always be. Quest forth…

The en vogue status of low-wattage combo amps remains a boon for any guitarist on the lookout for a compact amp. Just about every major amp company and most boutique shops are offering at least one model in the 12- to 18-watt range and that’s a great thing. What’s not to like about an amp that you can push hard without blowing out the windows or that you can throw in the front seat of your car for a gig?
Nolatone Ampworks — and the work of Paul Sanders — are already standouts in this fast-growing amp category. Hand built by Paul in Raleigh, North Carolina, using only the highest quality parts, Nolatone models like the June Bug and Chimey Limey have already made a mark for their interpretations of Fender Tweed and Vox tones. They might also be some of the sharpest looking amplifiers available today. And on both the sound and visual front, Nolatone’s 15-watt Rotten Johnny is every bit as spectacular a performer as its cousins in the Nolatone line.
The Dirt
Weighing in at a very reasonable 28 pounds with dimensions similar to a Fender Blues Junior (18″ x 16″ x 10.5″), the Rotten Johnny is an open-back 1×12 combo constructed of solid dovetail-jointed pine. Our review Rotten Johnny came in covered in two-tone brown and crème vinyl with basket weave grille cloth, and sported the signature Nolatone “V” panel TV front design. The 12″ speaker is a 25-watt Warehouse Green Beret, which is designed to sound like a broken-in Celestion greenback. The circuit is built around two JJ 6V6 power tubes (you can also request EL84s) and two 12AX7s. Everything under the hood is top-notch, including custom Mercury Magnetics iron, 1-watt carbon film resistors, F&T filter caps, Switchcraft jacks, and Carling switches laid out on a hand-wired turret board.
Unlike many lower-wattage amps, the Rotten Johnny offers far more control options than a single volume and tone control. The top panel consists of a unique 3-band EQ (Bottom, Mid, Top), as well as Pre- and Post-Gain controls and a Master volume. A Mid Lift switch (which can also be activated by a footswitch) effectively works as a boost for solos. Power and standby switches reside next to a red jewel power indicator.
The EQ section is a little more flexible than what you’ll find on a production-line low-watt amp. The Bottom control is a 6-way switch that progressively rolls off bass. The independent Mid control is not part of a typical tone stack configuration — dialing it down extends the highs and lows to create a very Fender-like mid-scooped tone. The High control, meanwhile, is a Vox-style top-boost reverse-wired to enable players to move from chiming to much darker tones by backing off the control. Borrowing a move from Nolatone’s June Bug design, the Pre- and Post-Gain controls work in tandem to control the amount of gain to the second stage and phase inverter respectively.
Rockin’ the Filament
With a Godin Icon Type 2 with Duncan P-Rails in hand, I got right down to the business of exploring the wide-open voice of the Rotten Johnny. With the Godin set to the humbucker position, I cranked the Master to full, set the Post Gain to around noon and brought up the Pre Gain until I got a rich, full distortion. The sound was raw and thick, but I wanted a little more clarity, so I dialed back the Bottom knob by a few clicks, scaling down the thickness a touch, but opening up the sound considerably. The combination was reminiscent of Frampton’s Rockin’ the Fillmore-era Humble Pie tone — a pretty huge sound for a 15-watt 1×12 combo. And if I closed my eyes, I’d swear I was listening to a full stack in miniature. For years, I’ve tried to harness 100- and 50-watt amps with attenuators and master volumes and never been totally successful. Needless to say, I was stunned when two 6V6s pushing a single 12″ gave me what I’ve been looking for—and then some.
Wielding my ’74 Les Paul Custom and with the Mid control set to the non-lift position, I was able to dial in AC/DC rhythm tones with just the right amount of kerrang and chime to create the illusion of a blaring baby JTM45. And setting the Pre Gain to noon and ramping up the Post Gain added gobs of thick, juicy crunch with just enough bark to cut through a mix. This is where the Top control really shines — pulling the Top back just a touch takes some of the edge off without muddying the tone. It’s voiced for just the right amount of sheen and clarity without ever being brittle or ice-picky. The top-cut configuration also makes the effectiveness of the Mid control’s sweep range very apparent — enabling boosts in presence that aren’t too brittle.
The Mid control is almost like another gain knob, delivering more distortion and dimension the more you crank it. And with the Mid Lift engaged Rotten Johnny turns into a roaring fire-breather with more gain than most of us would ever need. I’ve rarely heard a 6V6 amp sound this way — often assuming some of the tonal qualities of EL34s and EL84s. Though it only takes cutting the Mid and backing off the Pre Gain to get back to more blackface-like territory that was a perfect match for my Strat.
For a 15-watt amp, the Rotten Johnny doesn’t lack headroom. Because there is so much control via Pre and Post gain over how hard you hit the tubes, I found myself digging deep into the wealth of Strat-friendly clean sounds you can get with less aggressive use of those controls. It was easy to conjure thick and chewy cleans with just a hint of grind by pushing the Post Gain and leaving the Master wide open. Even with the Mid Lift engaged I could still hit the guitar hard without harsh sounding breakup. And I was always able to shape the thickness with the Bottom switch, which I used extensively to match individual guitars to the amp.
The Verdict
It’s been a long time since I’ve been so excited about a new amp. The Rotten Johnny has a huge range of brilliant tones in a compact design that, at $1399, doesn’t break the bank. For bedroom or studio musicians, it’s a dream because you can coax out cranked stack sounds without knocking down walls and get the most beautiful cleans with the twist of a few knobs. The construction is top notch and the styling is classy and cool. For an amp that’s roughly the same size as a 1×12 cab and weighs less than 30 pounds, it has the sonic personality of something much larger. I only wish this little guy was around when I first started playing guitar. Thankfully, I’ll have the chance to make up for lost time — my own Rotten Johnny is on the way and I can’t wait to cut loose.
Buy if…
you want everything from Brit aggressiveness to blackface tones in a compact package at a fair price.
Skip if…
you actually need the power to blow down barns.
Rating…
![]()
![]()
![]()
![]()
![]()
Source: https://mercurymagnetics.com/pages/news/PremierGuitar/PremierG-30.htm
Something very cool is happening the basement of Mr. Music, Boston’s favorite family-owned music store in Allston, Massachusetts.
After a lifetime of gigging, amp repair, studio building, and tone tweaking for stars like Joe Perry of Aerosmith, master technician Rob Lohr is building some of the finest boutique tone monsters to come along in a while.
I have always been impressed with anything I heard that was built in his shop, located in the basement of Mr. Music. Rob is a person of great detail. A technical question put forward to Rob usually yields a tutorial on the workings of electrons with respect to our favorite instrument, the guitar. Through the years, Rob and I have had many conversations about what a practical amp should sound and look like. A veteran of the gig scene himself, Rob understands what the working artist needs. In my world, 50 percent of the reason why something sounds good is because it does not need a crew of roadies to transport it, set it up, and break it down. These days, as indie artists, even for high-profile shows in theatres, we usually show up with our own favorite rig. It had better be light and tone-worthy!
When I heard Rob’s Dumbalina, an amp inspired by the legendary Alexander Dumble’s Overdrive Special, I was instantly hooked. Here was an amp the size of a Fender Princeton Reverb that was a very high quality, point to point, hand-made tone machine that had a kick like amps twice its size. Rob Lohr had somehow managed to pack all of the essential features of the best Dumble-inspired amps into a space the size of a Fender Princeton Reverb. He did this with no sacrifice in power (45w) and the highest quality components!
There are many other great D-Style amps whose components are a cut below Dumbalina’s. Yet Rob charges a modest $1800.00 for the basic amp, with additional costs for any custom work. Okay, yes, I did have to pay extra for him to add my name to the front in vinyl lettering with Fender-style script. Don’t be confused though, this is not the “Thaddeus” amp!
With a switchable 4, 8, 16 ohm extension speaker output, the amp offered everything you might need to grow your rig. Small gig: use the onboard 12-inch G12-T75 and walk in with the amp in your right hand and guitar in the left. Large gig: take an extension cab and utilize all of the 45 available watts to rock the stage with two or more 12-inch speakers.
The footswitchable Overdrive channel sounded like the mating of a Dumble Overdrive Special and a Two Rock Custom Reverb Signature. Overdrive that sings without over-saturation and responds to tonal tweaks on your guitar or subtle finger ornaments. The quality of OD of this amp, I will testify, is simply one of the best I have played. The clean channel can be crystal, but if you push it, you can get a singe on the top notes and a roar on the power chords.
The +4 effects loop provides you with the opportunity to use the highest studio grade effects in the loop. Aside from being whisper quiet, plugging in a high-end effect processor seems to lend a three-dimensional quality to the amp that makes it sound much bigger than its physical proportions might suggest. Of course, you can use a dumble-ator or clone thereof to use line level floor pedals, but why not use some of the high-quality studio grade pedals that are coming out these days? TC Electronics makes a couple and so does Eventide. More and more pedal manufacturers are giving you the option of the studio level +4 signal, ready to plug into your D-style effect loop. (See previous post on Effects Loops).
The three switches that you normally find on D-clones for Bright, Mid, and Bass are neatly hidden in Dumbalina: Each tone knob (Bass, Treble, Mid) has a hidden, whisper quiet, pop-less pull-boost feature which takes the whole thing up to a different kind of 11 heaven. The Volume knob has a presence boost. When the Tone Bypass is engaged (often called Pre-Amp Bypass or PAB in other Dumbl- inspired amps) the treble pull pot doubles as a bass boost. The result is the most useful “PAB” option that I have ever seen with a corresponding increase in low end that makes this feature a very practical and useful option for me. Usually I shy away from PAB because it might sound a little gnarly, or less friendly in lower volume settings, even though it works wonders for cutting through in the heat of the mix at high volumes.
My most recent gig was a power trio gig, a Hendrix tribute concert. I used Dumbalina’s overdrive channel for the solos that were not over-the-top, so to speak. When the band started really bashing, I could get away with using my Tone Bypass to cut through the mix. Really very flexible tones on this puppy! The 45w is just what you need to sing at lower volumes. Push the envelope a bit and you get great power amp overdrive without scaring the non-guitarists out of the room. In addition, there is a master volume/loop send level that allows you to get the tones you are using at lower volumes without changing the character of the settings. A well thought out amp for the working musician. At 34 pounds, the amp is welcome at any gig that I play!
In the studio, Dumbalina reigns supreme. I have just completed tracks for a tribute cd. R&B versions of Jimi Hendrix tunes. I used Dumbalina for many of the guitar solos and rhythm tracks and, well, tune in next year in the Spring to hear what I think are pretty amazing guitar tones.
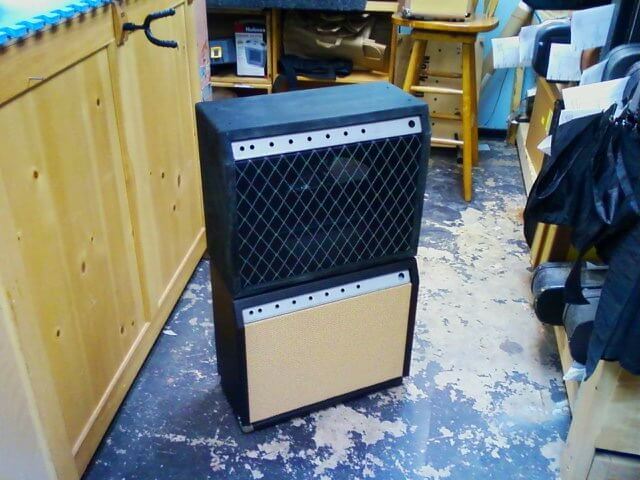
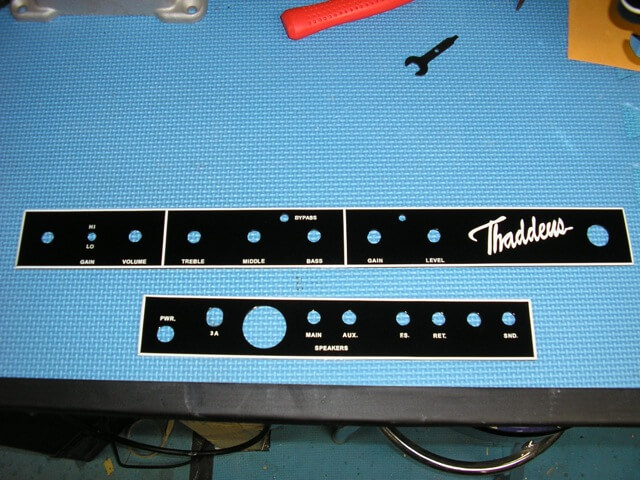
OLYMPUS DIGITAL CAMERA
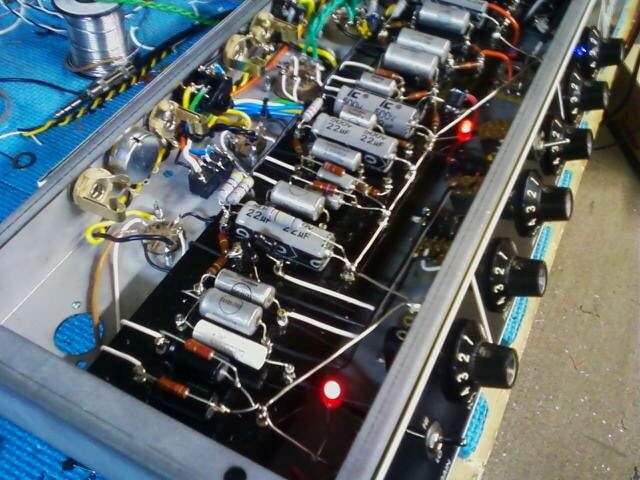 Rob builds every aspect of the amp. From the cabinet and grillcloth to the faceplate (painting and vinyl lettering)
the meticulously wired components inside this amazing amp.
Current wait time is only something like three months, since Rob is building each one by himself. I am sure as the word gets out, that list will grow and grow. It will still be worth the wait, I promise!
Here is the icing on the cake: roughly six months or so after you get the amp, after the amp has been broken in. Rob will sit there with you and do the final tweaking of the components WHILE YOU ARE IN THE SHOP! He will look at the levels and settings that you choose and tweak the internal components so that a great amp becomes an even greater amp, tuned to YOUR signature style of playing. This is an amazing benefit and it is the feature that pushes Rob to the front line of amp builders. (Isn’t that why Dumbles became so popular and expensive? Alexander Dumble would tweak them to the playing style of the owners). Rob recently spent 10 hours—yes folks, 10 hours in the basement at Mr. Music—tweaking an amp for client Alex Potts, so he could have it ready for his move to LA. In my Berklee Online course, Funk/Rock and R&B Soloing, I talk about signature tone. Folks like Robben Ford, who within a couple of notes, announce their presence on the recording whether or not you are even close enough to read the album credits. I believe that this amp can open a door to this concept, and with the post-build tweak, you just might be creating some new history.
Here is the latest version of Dumbalina that Rob is completing, with a couple of new tweaks and slightly different cosmetics on the faceplate, which include corresponding faceplate lights for the lighted footswitchable Overdrive and Tone Bypass features: Sweeeeeeet!!
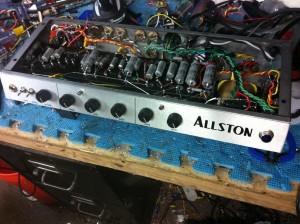
Here is the scoop on Dumbalina, from the hand of the builder himself, Rob Lohr:
CABINET-The cabinet is Grade “A” pine joined with machine cut half blind dovetail joints and internally braced with poplar. I will cover the cabinet with any available tolex and grille cloth, and you have your choice of appropriate loudspeaker*. The standard faceplate is brushed aluminum with black letters, but I can do colors for a small upcharge and you have your choice of knobs**. The handle is a good quality faux leather that comes in brown, black, or blue, and I use 1″x2″ heavy duty rubber feet and stainless steel cabinet corners and hardware.
*speaker must be of appropriate power handling.
**knobs must fit 1/4″ shaft and comply with existing chassis hole spacing.
CHASSIS– The chassis is steel with welded joints and all hardware is stainless steel. The transformers are MERCURY MAGNETICS FBFVL-P 120v power transformer, FC-VIBROL choke and FBFVLR-OS Fatstack output transformer(4,8,16 ohm selectable). I can do selectable AC input for a small upcharge. The tube compliment is: 2x 12ax-7(pre), 1x 6sl7(PI) 2x 6L6GE(output) and a GZ34(rectifier). I use Belton tube sockets and retainers. I use a combination of Alpha, Clarostat, and Bourns potentiometers, Cliff and Switchcraft jacks, plugs and switches. All shielded leads are Mogami console cable. All unshielded signal leads are teflon coated solid copper core silver clad. All power supply wiring is PVC jacketed stranded copper.
ELECTRONICS– 100 percent hand-wired point to point construction. Hand made 1/8-inch fiberglass turret board, a combination of Metal oxide, metal film and carbon composition resistors, Oil and foil signal capacitors, and high quality electrolytics. There are some other solid state components, but they are related to the switching circuits and are not in the audio path.
LIMITED LIFETIME WARRANTY– I don’t warranty speakers, tubes, or output transformers for obvious reasons …but if anything else ever breaks I will fix it for free for ever and ever. Or until I die, which ever comes first.
Here is the bullet list of Dumbalina Specs:
Output power———–45 watts
Tube compliment——–2x 6L6GE, 2x 12AX-7, 1x 6SL7, 1x GZ34
Output Impedance——4,8,16 ohm selectable
Effects loop———— post pre/ pre power half normalled break out with send level.
Foot switches———-Over-drive and tone bypass(PAB). Both can also be controlled by front panel switches and are indicated with both front panel and foot switch mounted LED’s. The footswitch over-rides the front panel switches.
Controls—————-Volume, Treble, Middle, Bass, Overdrive, Level (ratio), send level.
Pull Pots:
Pull Volume————-Bright
Pull Treble————–Hi mid boost
Pull Mid—————–Lo mid boost
Pull Bass—————-Bass boost
Speaker Celestion G12T75, 8 Ohm
Rob Lohr can be reached at Mr Music in Allston Massachusetts at 617-783-1609 or at robmadoak@hotmail.com
Here are few demo videos that I just did:
OVERVIEW:
It was originally built around the design of one of Jim Marshall’s favorites, the Fender Bassman; like the Bassman, the JTM45 was actually a fantastic guitar amp. Because of its consistent popularity, Marshall has offered a reissue version of the head — more than 20 years after production of the original JTM45 ceased. While the reissue is built with modern components and assembly techniques, it retains much of the tone, responsiveness and character of the original, hand-wired versions of the early days. No wonder builders today still carry on the tradition of the JTM45, and guitarists continue to seek out the pure simplicity and touch response of this tone machine. To celebrate the JTM45, I got together with my Sunday afternoon amp group, after contacting a handful of respected amp builders who sent us their versions of the amp. We fired them all up alongside an original and a reissue JTM45 to take a listen — and to enjoy one of the best amps ever designed.
About the Authors
About 5 years ago, while playing a 9/11 benefit show, I had the good fortune to meet two people who would not only profoundly impact my life with tube amps, but would become lifelong friends. John Rossi and Tony Burns were there that day; Tony, a killer player and a regular on the Tempe/Phoenix music scene, and Johnny, his friend and amp tech, making sure Tony’s amps were running well in 115 degree heat at the outdoor amphitheater. When I saw Tony’s wall of Marshalls next to my backline of Marshalls, it was an instant conversation starter.
We spent time between sets that day discussing the various finer points of our amps and gawking at each other’s rigs. The show went great but my ’67 Super P.A. felt a bit stiff, and wasn’t reacting in the most flattering way. This incident proved to be the catalyst, as Johnny was an underground semi-retired tech and ultra-fanatic Marshall enthusiast, and he had some ideas that he wanted to try out. He invited me over the following Sunday to check out the amp, and to experiment with various preamp and power amp tubes while BBQ-ing and having a beer. Tony was there, and it became clear that we all had a deep respect for these amps; rather than modify them, we wanted to bring them back to their former glory. After five years, and dozens of hacked-up Marshalls coming back from the dead, here we are. Over that time we’ve learned more about these amazing amps than any of us ever anticipated, and we’ve have had a blast in the process. I have no doubt in my mind, based on my readings of the various amp forums, that there are plenty of groups just like us all over the world doing the same thing.
The Lineup
The lineup consisted of our own 1965 original and 1990 reissue heads, two MetroAmp JTM45s (a kit version as well as the GPM 45), a Germino Classic 45, a Wallace Amplification BKW45 and Mojave Ampworks’ new Special Edition Plexi 45 head. After searching through our collection of cabinets, we settled on both an eighties Marshall JCM800 4×12 with black back 25s, and a Mojave 2×12 cab with 1963-era Celestion Alnico Blues. It may sound strange that there were no pinstripe or basket weave cabs used for the roundup, but that wasn’t for lack of trying. Among all the members of the amp group, we actually have a pinstripe, a basket weave and a variety of Marshall 4x12s, but for some reason we always come back to the early-eighties JCM 800 cab with black back 25s.
That particular cab has more clarity, tone and authority than any other, and it remains our favorite in the bunch — despite the cool factor of the older cabs. The 2×12 with Blues was a natural choice, as that flavor shares similarities with the mid-sixties Marshall cabs and is also a popular speaker configuration for Bluesbreaker combos. The guitars we used were our standard array of Les Pauls from the ’70s, ’80s and 2000s, as well as a newer 2008 Fender Strat and two early-seventies Strats. With everything in the room (it was quite a sight!) we were ready to begin.
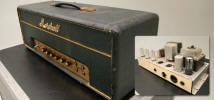 Original 1965 JTM45
To get our ears accustomed to the JTM45 sound, we began by firing up our ’65 head with a Les Paul. Normally, this head has EL34s in it, but we borrowed the Genelex KT66s from the Mojave and biased the amp to accommodate them. It made sense to us to use KT66s, because they were what the amp was designed for. With everything looking good, we flipped it from standby and beheld the beauty of this vintage masterpiece. It’s no wonder players and collectors are paying big bucks for these amps; everything we played through it sounded incredible.
What was amazing was how much of a rock ‘n roll amp this really is. Considering how long it’s been since it was conceived, the amp’s sound remains surprisingly current. The distortion is organic, full-bodied and earthy, and it allowed the personality of the guitar and player to shine through. While it was very easy to play, this is an amp that still requires a level of discipline and control to fully harness its capabilities. It makes sense that players who want to be heard would play on this style of amp, because like it or not, whatever you play through the amp is… well, amplified. It just comes out better.
We played through it for a good long time, switching guitars and speaker cabinets to hear it in as many different configurations as possible. Whether it was a Strat, a Les Paul, a 2×12 or a 4×12, the sound was always remarkable — perhaps the very definition of great tone. Subjective? Yes. Brilliant? Absolutely. Rolling back the volume on the guitars exposed a beautiful clean tone that was harmonically rich and defined, never muddy or dull. Even with the guitar’s volume knob all the way up, the dynamic response of the amp, and the way it musically fed back, was awe-inspiring.
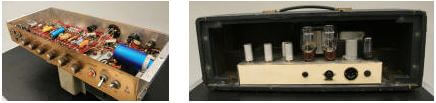 Once we had established a base tone for comparison’s sake, it was time to play and listen to the other amps. Before I break down each individual amp and builder, I must observe that each and every one of the amps had ridiculously good tone, and they all sounded like JTM45s, but each had its own unique voice. Aside from the reissue Marshall, all of the amps are hand-wired. The reissue Marshall was of PCB-construction, and used the standard parts and components that Marshall was building their amps with during that era. I spoke with Mitch Colby from Korg USA (Marshall’s US distributor), who told me that the reissues have not undergone any significant changes since their reintroduction 20 years ago. While they are using the components that Marshall builds with today, they should yield very similar tones to the earlier reissue amps.
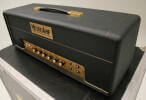 George Metropoulos is no stranger to the world of Marshall amps or to the online amp building community. Having run MetroAmp for some time now, George offers everything from fully built replicas of many classic Marshalls to ready-to-build kits and hard-to-find replacement parts for vintage Marshalls. A player, George honed his amp-tech skills by adopting a DIY approach, taking care of his own amp repairs on the road. This extended into repair work at home, and then really took off when amps began coming in for restoration rather than simple re-tubing. After his ’73 Super Lead was stolen from a gig, he realized it might be best to leave the valuable amps at home, and so he embarked on a never-ending quest to replicate the tone of the old Marshalls.
Like all the builders in the roundup, George is passionate about vintage Marshalls and obsessive over the details that make these amps so coveted. We received two amps from Metro: the JTM45 kit (which can be purchased already assembled for an additional $400) and the GPM45, George’s custom-built JTM45 using NOS vintage parts. When we fired up the MetroAmp 45s, it was clear that they both came from the same camp. Both amps were meticulously built and incredibly precise in their layouts. The main physical differences between the amps came down to the caps, resistors and tubes. Both amps shared the same iron and layout, so they also shared a lot of the inherent tone in their circuits. As George is a fan of the mid-sixties JTM45s, Metro’s transformers are based on the Drakes, rather than the earlier Radiospares iron [editor’s note: Kit also comes with optional Mercury Magnetics transformers]. Still, there was no question that the GPM45, which included NOS Phillips mustard caps, Allen Bradley carbon comp resistors and a gorgeous set of Genelex KT66s, was sweeter sounding.
While those differences accounted for a tonal upgrade, what made the differences even more compelling was the way they affected the touch factor of the amp. Much like our ‘65, the custom-built Metro had an ease about it that felt like a broken-in vintage head, making it a breeze to dig in, or to lay back on the strings and feel the amp act as an instrument. It was truly inspiring. Of all the amps in the roundup, this amp sounded most like our ’65 — frighteningly close! I should mention that the Metro kit version was actually plugged in first, and before comparing it to the GPM45, we all agreed we’d be thrilled to have one in our collection. We may be splitting hairs here to some degree, but knowing that anyone can buy a complete kit for under a grand, and have that kind of quality and tone — that says a lot.
Metro’s JTM 45 Kit:
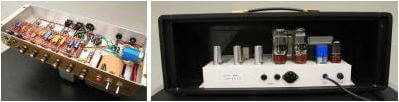
Metro’s GTM 45 Custom Build:

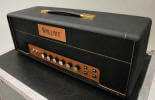 Wallace Amplification BKW45
Brian Wallace has electronics in his DNA. His father, an electronics engineer, and his grandfather, an RCA tube repairman, were both instrumental in his early education and development in tubes and electronics. When he was young his father gave him a 75-in-1 electronic projects kit and further encouraged Brian by letting him watch as he built his own projects. Like all of the builders in the roundup, Brian is a player. He began modifying amps in 1974, when he removed the speakers and baffle in his Checkmate amp and replaced them with a baffle he created and some purchased speakers — altering the sound of the amp and thus beginning his lifelong journey. In 1995, he was approached by Guytron Amplification to help out while they were getting started. A positive experience, it propelled him to the next level and led to the creation of Wallace Amplification, which now offers several amp models as well as replacement transformers under the Marstran name.
Wallace’s first amp is the BKW45, but he is more than a clone maker. Recently he introduced the Abaddon, which is a 50-watt master volume head consisting of four gain stages in the preamp. There is much more to come, including a line of pedals and a reissue of the Fuzz Ace pedal he made back in the early ’90s. The BKW45 is a unique flavor of JTM45. A hair darker in tone and possessing slightly less gain than all of the other models, including both the vintage and reissue Marshall, it yielded enormous bloom and a bold, thick, sustaining quality. Even though there was a little less gain, it didn’t affect playability, and we never struggled with the amp. It was one of the rarest qualities I’ve experienced in an amp, and certainly an unexpected bonus.
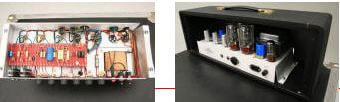 The Wallace had a magical ability to push notes through loud and clear while still being able to dish out gritty and harmonically pleasing chords that didn’t fight the non-perfect intervals they were built on. This all came out of an amp that was using tubes you can buy today without breaking the bank.
Speaking of breaking, check out the sidebar on what the BKW45 was subjected to by UPS en route to our roundup. In spite of the gorilla treatment it received, the amp arrived without shattered glass and performed flawlessly throughout the entire set of three sessions of playing and listening. That’s a testament to a solidly built and roadworthy piece of equipment. And one look inside the amp will show what a dedicated and precise builder Wallace is. In tone and build quality, the amp is a work of art.
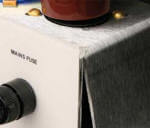 Ever wonder what could happen to your amp in shipping? In the case of Brian Wallace’s BKW45 amp, UPS had a field day, and decided it would be a lot of fun to throw it around. When the amp arrived, it was packed neatly in a new cardboard box with padding inside suspending the padded road case that housed the amp. That’s double-boxed and protected by a case built for heavy abuse. Sadly, it took one good slide down the end of a ramp and collided with either another box or the wall of the truck. Though the box didn’t show any signs of abuse on the outside, it was clear that something had shifted when I opened the case. Take a look at this picture of the damage and the way the entire amp was shifted to one side because of the impact. Believe it or not, the tubes didn’t shatter and the amp worked fine, but it was cosmetically damaged by a broken front Plexi panel. This isn’t the first time this has happened, but it’s the first time I’ve seen it happen with this type of road-worthy packing. Let this serve as a reminder to always insure your amps, as the shipping company can’t tell if you’ve got a bag of peanuts in a box or an amp that was lovingly built by somebody like Brian.
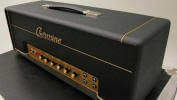 Germino Amplification Classic 45
Greg Germino is another lifelong guitarist who was bitten by the tube-amp bug after catching the Allman Brothers Band back in 1972. He was so inspired by that show that he switched over from acoustic to electric guitar and began taking electronics classes in high school. In 1979, he requested schematics from both Ampeg and Unicord (Marshall’s US distributor at the time) and began his hands-on education with tube amps. He spent the ’80s at an electronics job, and by the early ’90s he was moonlighting doing tube amp repair for a few music stores. He continued to play live with both 50W and 100W Marshalls during that time and moved to Durham, NC to work at Bull City Sound — working on tube amps from the big-name amp companies.
This led to Greg’s being commissioned by Mojo Musical, where he built their Tone Machine amplifier. The following year, 2002, he began work on the prototype of his Lead 55 amp, which debuted in May of 2002. The Classic 45 model is based on the earlier Radiospares-style output transformer, rather than the Drake 1202-103used in the ’65-’66 era, and the circuit is exactly what you would find in an earlier original. The Radiospares-style OT is supplied by none other than Chris Merren, who is highly regarded in the world of Marshalls, and known to make some of the most accurate transformer replicas out there.
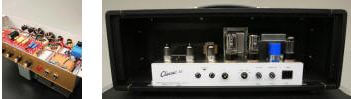 The Classic 45 was the only amp in the roundup that used 6L6 power tubes. Greg’s decision to use them was a combination of staying true to the earliest tubes Marshall used on the original JTM45 amps and his belief that the current crop of 6L6s sound and perform better than newer KT66s. NOS and vintage 6L6s are also less expensive and more plentiful than NOS KT66s. Our immediate response to the Classic 45 was that it was a lively and aggressive amp, with tons of power that made the pick explode off the strings. In ways it reminded us of our favorite ’67 Super Bass in its volume and attack, but it still retained the sound of a 45. It may very well have been the loudest amp of the bunch, and that volume translated to a feeling of excitement that made the amp extremely fun to play. It was present without being shrill and had a super-tight bottom end, no matter what guitar we played through it. While the Classic 45 had tons of natural gain on tap, it also cleaned up nicely when rolling back the volume on the guitar, revealing a bright and sparkly chime. This amp is a real beast, and it could hold its own against 100W amps without flinching.
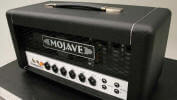 Mojave Ampworks Special Edition Plexi 45
Anyone familiar with the JTM45 would surely be jealous of Victor Mason. Not only has he seen more than his fair share of vintage Marshall, Vox, Hiwatt and other rare treasures come through his shop, but Victor recently acquired 26 of the all-time greatest JTM45s ever assembled via the Kronemyer collection, and he’s got the pictures to prove it! This is just one of the factors contributing to the obsessive nature of Mojave (and the associated Plexi Palace). Having been around for over a decade on the internet, Vic has been repairing, restoring, buying and selling vintage Marshalls for quite some time now. Stemming from his early desire to find out how EVH created the classic brown sound, Victor embarked on his journey through countless hours of digging into vintage amps and learning where their strengths and weaknesses lay. Mojave now offers an entire line of amps to serve the classic Marshall tones and well beyond with innovative features and designs. The Mojave Plexi 45 also has two very unique features over a stock JTM45. First is a simple feature to allow volume control by way of throttling the power level. Second is a line level output, which is adjustable and incorporates a ground lift.
Standing apart cosmetically from the rest of the amps, the Special Edition Plexi 45 is built on the same footprint as the Coyote and Scorpion designs, with a white-and-black color scheme and chrome hardware. The head is built with an open grille cage that allows for maximum airflow to keep the set of completely NOS glass cool. The 45 supplied for the roundup consisted of a pair of 1970 NOS Genelex KT66s, 3 Mullard 12AX7s and a Mullard GZ34. Like the Germino, the Plexi 45 is based on the Radiospares transformers, which are custom wound by Mercury Magnetics.
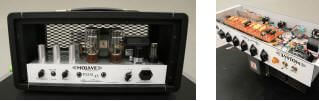 The chassis is a thing of beauty; the .09″ thick aluminum, with a high tensile strength and welded edges and seams will ensure it will not flex, bend or develop fatigue, like the early, folded, softer chassis, and will prevent the heavy transformers from causing the chassis to sink in and sag. Mojave deviates from the original JTM45 by using modern, tight-tolerance parts. Custom manufactured caps and metal film resistors allow each amp to sound as close to the one built before it as the one after it. Consistency is something that Vic definitely strives for, and it shows in the build quality and attention to detail, and the desire to add convenient functionality to his amps.
We found in testing that not only did the amp have an extremely low noise floor, but that it was an authoritative and powerfully voiced amp. There was definitely something different in the tone of the Plexi 45; it was cleaner sounding, but still very bold. Having been to Vic’s shop, I was fortunate enough to play one of the 26 JTM45s he had acquired, and I’m positive that the experience with those amps had more than a little to do with the design of the custom Mercury Magnetics’ Radiospares transformers made for his Special Edition model. The amp is built like a tank.
 Marshall Reissue JTM45
While the reissue looked very similar to the ‘65 on the outside, especially due to the fact that it’s already 20 years old, the differences on the inside were quite pronounced. Assembled with more modern methods, and using a PCB rather than hand-wired turrets, you could easily be fooled into thinking that it wouldn’t perform like the others. This particular amp was the only one in the bunch to use EL34s rather than KT66s or 6L6s, so the sound was definitely different. It was incredibly loud and focused sounding, and actually had many of the characteristics of a Super Lead. The sustain and power of the amp was incredible, and for an amp that can be found used for around $1000, this is a sleeper bargain. Marshall has taken some flak for their amps sounding stiff and cold from the factory, but with a little attention — slightly hotter bias and good tubes — this amp is a monster. And just because it says it’s a 45-watt amp, don’t harbor any illusions that it would be a good bedroom amp. This is a loud and powerful beast, and a tone machine as well.
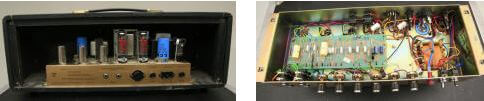
The Blindfold Test
As a final, fun test, we did a blind study, to see how accurately I could identify each of the various amps in the roundup. Johnny and Tony set up the group of amps, and I sat in a chair with my back turned away from them. With the guitar plugged in, they began to fire up the various amps, and we got rolling. Out of all the amps, I was always able to distinguish the Wallace BKW45, due to it’s slightly darker sound. The Metros were also fairly easy to spot, but I ended up guessing the kit as the custom build and vice-versa. The ‘65 was also an easy amp to recognize, but as ear-fatigue set in, the lines began to blur substantially. Pretty soon, I was confusing the Germino for the reissue JTM, the Mojave Plexi for the Wallace, and the Metros for the real JTM. It just goes to show you that all of the amps performed remarkably well, and you can be fooled when you’re not seeing what you’re playing, so never discount a PCB reissue head as a second fiddle to the real thing. In the mix of a band, these differences become small, and any one of these amps would hold their own any day of the week.
Wrapup
To have the opportunity to play through so many variations on a classic theme was not only fun, it was educational. Each one of the builders excels in creating their own unique version of the great rock and roll amp that Ken Bran, Dudley Craven and Jim Marshall built back in 1962. While like all Marshalls, the JTM45 went through changes in tubes, components and designs over its lifetime, there is a trademark flavor and color that still can be found in all of them. Not everyone can afford a vintage 45, but with the help of these builders we have the opportunity to get into that sound and have build quality that will last for years.
Source: https://mercurymagnetics.com/pages/news/PremierGuitar/PremierG-20.htm
Somewhere along the way, guitar amplifier tone got carelessly shoved into two broad categories – American and British. Fender being the quintessential American tone and Marshall being the obvious default for midrangey and reverb-less British tone. Within each, of course, there are distinct variations… Ampeg, Magnatone, Valco and Gibson, for example, are also American through and through, yet they remain distinctly different in sound and construction, and would rarely be mistaken for a typical Fender. Among British amps, Hiwatt, Sound City and Vox present equally diverse varieties of “British” tone that won’t be confused with a classic plexi Marshall head. But simply adding reverb or delay to a British amplifier will often throw listeners completely off as to its origins, while plugging into the Normal channel of a vintage Fender brown or blackface amp with the right guitar can produce an exceptional “Marshall tone.” Our recent experiment with our ’62 brown Vibrolux and a Goldtop Deluxe Les Paul with Lollar mini humbuckers rammed this point home with alarming clarity…. The point is, labels don’t always serve creativity and discovery well, and in the realm of supposed “vintage amp tone” where different examples can vary so dramatically, labels are worthless in generating much more than “skull chatter,” to quote Kye Kennedy. But, we still crave “Marshall tone,” whatever our individual perceptions of that sound may be. Well, since you asked….
ZZZZZZZZZZZZZZZT!Yes, Gear Page wankers, we just did it again. Careful you don’t get a scab on that thing… it might get infected and fall off. We’ve unearthed two alternatives that will give you the bigger, bolder version of Marshall tone that you remember from your early Jeff Beck Group, Zeppelin and Cream albums, but at a volume level you can easily live with and actually enjoy in 2008.
A reader alerted us to Roy Blankenship, oh, about a year ago, and it took that long to get an amp shipped for review and develop an interview. It was worth the wait. Blankenship builds a manageable range of custom amps in Hollywood, and he seems more interesting in building what he wants, the way he wants, than going big time. We like that. So here’s an introductory dose of Roy Blankenship – an entertaining and frank fellow to e sure. Our review follows Roy’s interview.
TQR: Can you summarize your experience with electronics and guitar amps? How did you get started initially with mods and repairs, and how did that evolve into actually building your own amplifiers?
RB: First, I was born in California. My father worked for North American Aviation, and was transferred to Columbus, Ohio when I was 6 months old. Therefore, I was born crazy, but grew up normal. My father was a genius – he could build anything, and, in fact, he built my first guitar amp. It was a single-ended 6L6 design and had a field-coil speaker. It wasn’t loud enough to play in a band, but I still have it and it still works. I later discovered the cabinet he used was the extension speaker for an old film projector.
I started playing piano when I was 3, and played brass instruments in the school band. When I was a Junior in high school, I bought my first guitar. A Kent solid body, for $49.95. I finally convinced my dad to let me buy a Health kit 2×12 solid-state kit so that I could play out, and that was my first experience with electronic assembly. I was the guy in the band who would dick with all of the equipment. We bought some PA cabinets that had JBL’s in them, I refinished and rewired them, having no idea what I was doing, but it always worked. My dad had a whole workshop including lathe and drill press, so I often did small projects and repairs, like building my own speaker box to house two Jensen 6×9 speakers for the car. I wish I would have had the vision to go into production….
I was a hobbyist for the next 20 years, getting into tube hi-fi and going through a dozen Dynaco Stereo 70s, not knowing anything about them, but doing little stuff like biasing and tube exchanges. I was employed in the music biz as a sales rep for four different firms, and the pinnacle of my career was as national sales manager of Symetrixin Seattle, WA. In 1991, I had a three-state sales territory selling body shop equipment. I stopped to see my friend, Dan Abell (of Abell Audio, 909 King Ave., Columbus, OH), best tech in the world, and drop off some octal sockets my dad had left me. Dan was all upset and expressed that his assistant had quit that day and he was in a bind because he had so much work. On a whim, I said, “Hire me. I have always loved this stuff.” “Can you troubleshoot a circuit?” I said, “Not yet, but I have people skills and can do any number of things so that YOU can work.” I knew his assistant wouldn’t answer the phone or wait on customers, so, after the first day, Dan said,“Man, I can’t believe how much I was able to get done. You’re hired!” Within two weeks, I was repairing circuits. The info that opened the door was the difference between negative and positive polarity transistors. We worked together for the next four and a half years, never an angry word between us. At one point, I wanted to live in California, so I went to a NAMM show and was hired by Groove Tubes as production manager. The learning curve was straight up – there is an incredible amount of information in that place. From there I started my own place in Santa Monica. To escape the chaos that is L.A., I moved to Florida to escape. I realized the repair biz was not a big money maker, so when two clients started encouraging me to build my own designs, I was up for it. We beat it around fora while, they finally ponied up and I built two EL84 amps.They loved them, I was shocked (they were nothing special),but they were the start. I still have number 1 that I bought back from the third owner. My experience with amp repair changed when I came to L.A. People in Ohio and Florida were happy when their amps worked… players in California wanted their amps to sound good. That opened a whole new area of learning. About the same time, I was running into a lot of overly-modified amps that oscillated themselves to death, so I added “demodification” to my business card. People would call me back and say, “Man, this amp really sounds great now,” and I would reply, “Yes, I made it stock.” The only mods I deem worthy are tone-stack bypasses on Fenders and one of two master volume circuits that actually work well. They each allow you to attenuate volume without losing everything, and they both originated with Ken Fischer, amp guru, God rest his soul. Tube amplifier technology stabilized in the mid ‘60s, and very few amp builders have done anything innovative since that time. In order to separate myself from the pack, I wanted to improve on the existing circuits. When these amps were made, people were playing clean, now everyone wants to crank them up,and in order for them to deliver, my belief is that they need a stiffer power supply. I get a lot of comments on how “loud” my amps are for a given wattage rating. One client said, “I have played a lot of these amps, they give up when you hit them, but yours sounds like a big amp.”
TQR: Describe the different models you build in terms of features, construction and tone, how they differ from vintage or other custom built amps, and what you specifically wanted to accomplish and/or improve on with each model.
RB: I build my own take on American and British circuits,and I employ a stiffer power supply than most. I am currently using turret and eyelet board construction, but a printed circuit board can be useful if made properly. The compromises made by volume manufacturers is where the “circuit board-is-bad” myth started. Proper CAD design can lend itself to a quieter, more reliable product as long as the bean counters don’t try to take a nickel out of it at every turn. All of my current product is hand-wired, and as you know, there is a lot of snob appeal and dick-measuring in this business. For example, some of my clients wonder why I do not use Clarostat potentiometers… I have tested all of these devices, and I have never had a bad Alpha pot, but the Clarostats I ordered for testing were 50% defective!
In the Leeds amp, I went with different trannies than most and a stiffer power supply; this gives it more beef. In the Fatboy, I discovered an output tranny that would allow me to use 6V6’s (for 15 watts) or 6L6’s (for 25 watts) without changing the speaker load. Though the tranny was originally designed for an 8 ohm load, it actually worked more efficiently at 16. Overall, using Mercury trannies has been one of the best decisions of this whole venture. Now when I hear an amp with any other tranny, they sound flat. I took one of my amps to visit a friendly competitor, he played it and enjoyed it, then fired up his own amp, and it sounded flat. He was looking at his amp as if,“Hey, what’s going on here?” I think that was his first side-by-side comparison and he could hear the difference, much to his own chagrin.
TQR: What inspired the use of a Variac with the VariPlex? Why not just build a master volume circuit?
RB: We wanted to create a cranked-up Marshall sound at lower volumes, but people have time and again expressed their dissatisfaction with the attenuators on the market and the smashed sound of a bad master volume circuit. I credit Dave Friedman of Rack Systems with the concept and the prototyping. We tried five different kinds of coupling caps, different types and brands of resistors, different trannies…you name it. Eddie Van Halen popularized the whole Variac concept, so we modified the circuit so you could go from full tilt boogie down to 1 watt and the amp would not shut off. We have sold 40 of those amps with no marketing other than clips on a forum. We are now introducing a similar amp with a master volume for those who want it whisper quiet, but saturated. There are two master volume circuits that I know of that sound great even when turned down to speaking levels. We are using one of those and a few other mods in the new model, the Custom 45.
TQR: You describe a process on your web site in which you A/B’d the VariPlex with a friend’s ’68 Plexi and you didn’t stop tweaking the design until 10 out of 10 guitarists chose the VariPlex in a blind test. Can you elabo-rate on how those tests progressed and the changed to the circuit that you made to achieve those results?
RB: I could, but I won’t.
TQR: In your experience, how much variation in tone and component values, including transformers, have you observed in vintage Marshall amps? Isn’t it necessary to listen to a lot of different examples and then choose an exceptional amp as a benchmark?
RB: Yes. We already had “the Holy Grail” plexi in house, so we compared to that one. Most amps will respond to love, but there are some that are just exceptional. The reason for this amp-to-amp variance is manufacturing tolerances. If your trannies are built with plus or minus 20% tolerances, that means your amp could vary as much as 40% from sample to sample.
TQR: The VariPlex doesn’t sound “new” in the sense that it isn’t shrill or bright and sharp like some replica Marshall amps. How did you accomplish this?
RB:That’s my secret.
TQR: How long is the wait for one of your amps once it has been ordered?
RB:We have Carry-Ons in stock for the first time. Generally, we like to say 3-4 weeks just to be safe. Most of this is the gray area of vendor delivery on cabinets.
TQR: What’s ahead? What do you want to accomplish in the future?
RB: I want to be a thorn in someone’s side so they will offer a butt load of dough, I will sign a non-compete, and go away. Then, I can sit on the beach and light my cigars with $100 bills and sip pina coladas. The funniest thing about that picture is that I don’t drink OR smoke. Actually, we are introducing a bass amp shortly. As we gain more exposure, I am sure we will have enough to do. I am happy with people’s response to my products. I do not want to get huge, and I will probably not offer many more models – it gets too confusing. But thanks for considering me as a worthy contributor to your magazine. www.BlankenshipAmps.com (818) 530-8853
Our experience with “vintage Marshall tone” was formed with two stout examples that we were fortunate enough to own and play for years. The first was actually a late ’60 Park ’7550 watt head, followed by a metal panel 1969 Marshall50 watt. Both amps displayed the classic tone, smooth distortion and touch-sensitive dynamics we love to love and eagerly oozed the warmth and dimensionality that reissues lack. This isn’t complicated…. We’d simply drag a newish Marshall clone of some sort into the music room, compare its sound to the old one and invariably say, “Not bad, but this one sounds and feels better.”
When we fired up the Blankenship, however, not only did it sound richer and fuller with more depth than our old Marshalls, but the tone controls actually produce changes in EQ that allowed the amp to achieve a level of versatility that has always been sorely lacking in the originals. And then, of course, there is the nifty Variac that allows the VariPlex to be played at nominal volume levels with no audible deterioration in the responsiveness or tone and the amp. Essentially equipped with features that mirror an original Plexi, the VariPlex is a 2 channel/4 input design with presence, bass, mid and treble controls. Channel 1 is the bright input; channel 2 is more bassy, and the two can be jumpered and mixed to taste.
We took our time developing an impression of the VariPlex, playing it for over two months. Bottom line – it produces an authentic, old-school Marshall voice with better EQ, clarity, and fresher, more vivid harmonic content. Its voice is exceptionally smooth, yet capable of acquiring the melancholy edginess of an early Clapton recording by simply managing EQ, and the Variac as a master volume control works brilliantly. The VariPlex impressed us as a near-perfect example of an overbuild, hand-wired, low-production amp inspired by arguably the best efforts of Jim Marshall and company, circa 1968. Just as the Balls M18 became our modern benchmark for low-powered, classic Marshall tone, so goes the Blankenship VariPlex in the 50-watt range. If there is a better-sounding modern alternative toa vintage Marshall, we have yet to hear it.
We also admired the neat, clean and easy-to-read design of the VariPlex silver control panel, somewhat reminiscent of our old Park. Among all the clones being cloned with Mojo boxes, this amp is a visual standout. And as far as internal build quality is concerned, let the pictures speak for them-selves. In all respects the VariPlexis a solid piece of work,returned to the builder with as much regret as any amp we have ever reviewed. In fact, we’re still thinking about it. Plex forth….